Are you tired of navigating through an unorganized WordPress menu, struggling to find your way to essential sections of your website?
Then don’t worry in this article I will show you 3 easy ways to create a submenu in wordpress that will organize your menu and will improve the user experience.
What Is a Submenu and How Does It Help the Website?
A submenu is a secondary or nested menu that appears within a main menu on a website. It serves the purpose of organizing and categorizing content or links more efficiently.
Using submenus helps to organize the website content. Imagine you have a website for a restaurant, and your main menu has a “Food” category. Under the “Food” category, you can create a submenu with items like:
- Appetizers
- Main Courses
- Desserts
- Beverages
Each of these submenu items can link to their respective pages where you showcase the appetizers, main courses, desserts, and beverages your restaurant offers.
This way, visitors can easily navigate to the specific section of the menu they’re interested in without scrolling through a long list of items. This will make your website easier to use which will decrease the bounce rate of the site and Improve the SEO of the site
So, let’s get started and learn how to create submenu in wordpress using three easy ways
1. Create a Submenu Using WordPress Dashboard
Creating a submenu using the WordPress dashboard is a straightforward process. Follow these steps to do it easily:
Step 1: Go to the Menu Settings
In the left-hand menu, find and click on “Appearance.”Then, select “Menu.” This opens the menu settings.

Step 2: Create a New Menu (If Needed)
If you don’t have a menu yet, no worries. You can create one. Click on “Create New Menu.”Give your new menu a name and hit the “Create Menu” button.

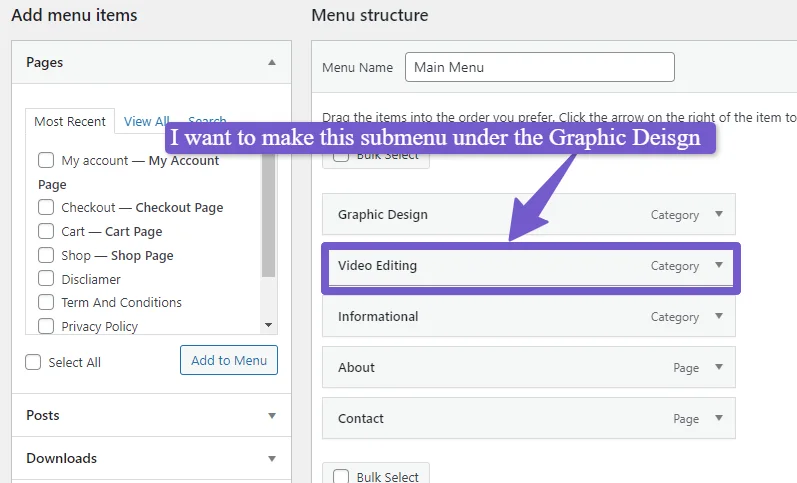
Step 3 Add Submenu Items
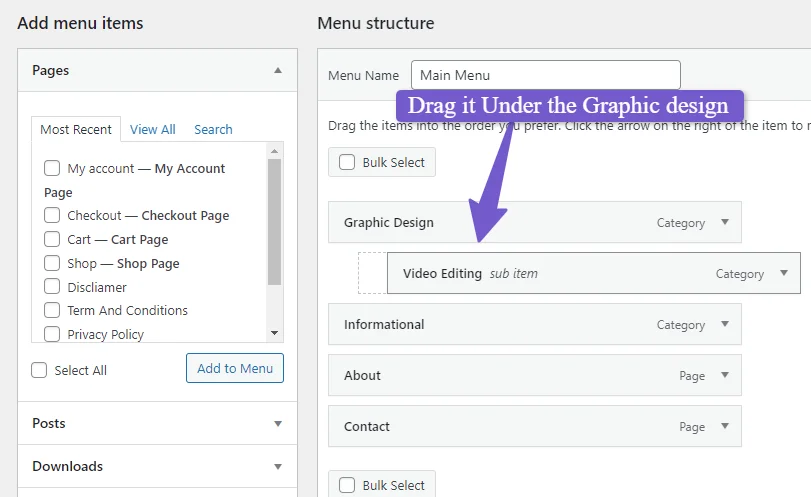
If you already have a menu, great! Now, let’s add a submenu item. Find the menu item you want to make a submenu. Drag and drop it below the menu item you want it to be a submenu of. It will indent slightly to show it’s a submenu.
Step 4: Customize Submenu Labels
Click on the submenu item to expand its settings. You can change the label to what you want it to display in the menu.

Step 5: Save Your Menu
After adding and arranging submenu items, don’t forget to save your menu. Click the “Save Menu” button.
That’s it! You’ve successfully created a submenu in your WordPress menu. This simple method makes your website’s navigation user-friendly and organized now if you want to do it on the front end then you can also create the submenu from the customizer so follow the next method.
2. Create a Submenu Using WordPress Customizer
To create a submenu in WordPress using the Customizer is recommended as you can see the menu changes in real-time so let’s get started!
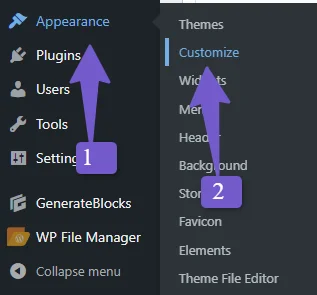
Access WordPress Customizer: Log in to your WordPress dashboard and click on “Customizer.” under the Appearance Tab.
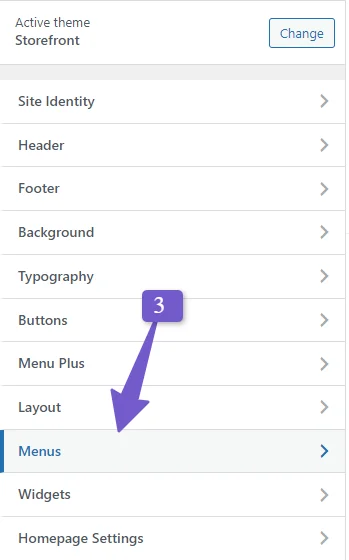
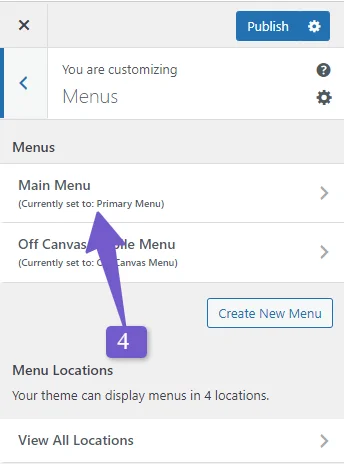
Select the Menu settings to Edit: Inside the Customizer menu, click on “Menus.”Choose the menu you want to edit by clicking on it.
Access and Reorder Menu Items: Once you’re in the menu you want to edit, scroll down to the bottom of the menu settings. Find and click on “Reorder.”You’ll notice that each menu item now has a set of arrows beside it.
To create a submenu item, use the up and down arrows to position it below its intended parent item. After positioning, click the right arrow to make it a submenu item.

The item will then be displayed slightly indented to the right, indicating it’s a submenu item. Repeat this process for other submenu items if needed.
Save Your Changes: Once you’ve organized your submenu items, click on the “Done” link. Click on “Save & Publish” at the top to ensure all your modifications are saved.
That’s it! You’ve successfully created a submenu in WordPress using the Customizer. Your website’s navigation is now organized and user-friendly.
You May Like to Read :
Add Categories and Subcategories in WordPress
Create Table in WordPress Without Plugin
Add Categories and Tags For WordPress Pages
Change Link Color in WordPress
3. Create a Submenu Using WordPress Plugin
Creating a submenu in WordPress is easy when you use a plugin like Max Mega Menu, especially if you want to create a mega menu with extra features.
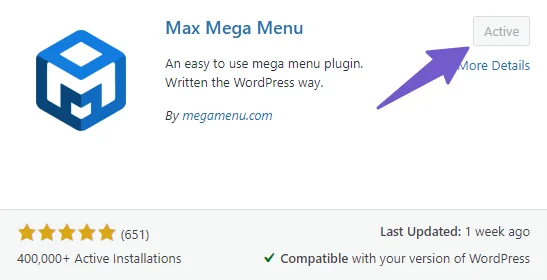
1) Install and Activate the Plugin: Go to “Plugins” and click “Add New.” Search for “Max Mega Menu” and install it.
2) Enable Max Mega Menu: Now, go to “Appearance” and click “Menu.”Look on the left side for the “Max Mega Menu” option and click to enable it.

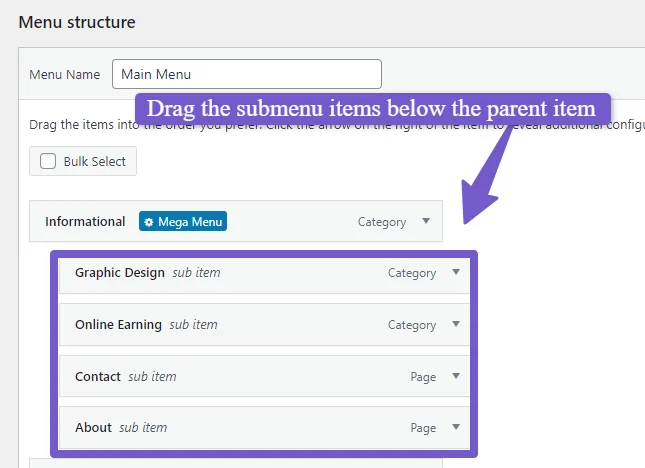
3) Create Your Submenu: Drag the menu items you want in your submenu under a parent menu item. Hover over a parent menu item and click “Mega Menu.”
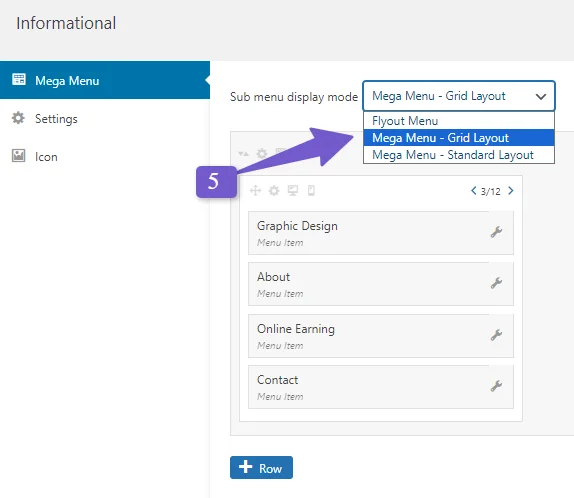
4) Choose Mega Menu Layout: A popup will appear. Look for the “sub-menu display mode” option and choose “Mega menu Grid layout.”
5) Add Columns (Optional): Click on the “Column” option to create a second column in your submenu. You can move some of the submenu items there.
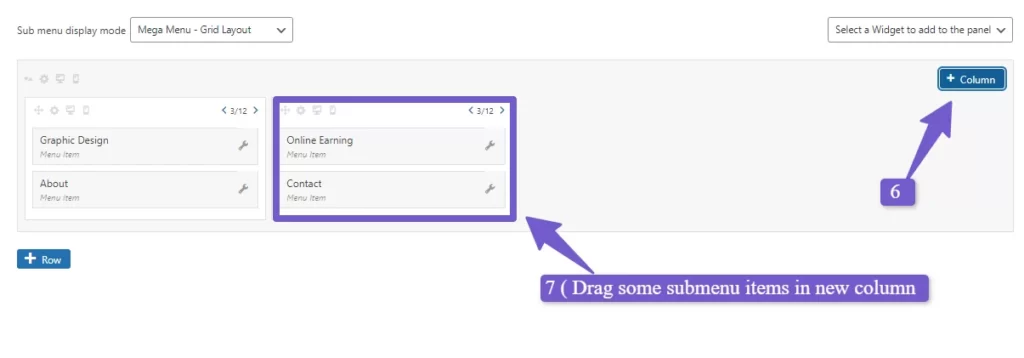
Your submenu will now look organized and structured the preview of the submenu is shown below:

Remember, you can make your mega menu look more professional and stylish by playing with the other options in the max mega menu.
FAQ(Create a Submenu in WordPress)
Below are some most common FAQs related to add submenu in wordpress.
How do I add a submenu in wordpress?
Creating a WordPress submenu is easy. Here’s how:
- Go to Menu Settings: In the WordPress dashboard, click ‘Appearance,’ then ‘Menu.’
- Add Submenu Items: Drag menu items below others to make them submenus.
- Customize Labels: Click on a submenu item to edit its label.
- Save Your Menu: Don’t forget to save!
What’s the difference between a submenu and a parent menu item in WordPress?
In WordPress, a parent menu item is a top-level item in your navigation menu. It’s the main category or section. A submenu, on the other hand, is a list of related items nested under a parent menu item.
Can I add icons to my WordPress submenus for visual appeal?
Many WordPress menu plugins, like Max Mega Menu, offer the option to add icons to your submenu items. Icons can enhance the visual appeal of your menus and provide additional context for menu items. You can choose from a library of icons or upload your own to customize the appearance of your submenus.
Conclusion
Making a submenu in WordPress is really important as It helps organize your website content and makes it easier for visitors to find relevant content. This means they’re less likely to leave your site in frustration, so the bounce rate will decrease which will improve your site’s SEO.
You have learned three different methods to create submenus:
- Using the WordPress Dashboard: A straightforward process that allows you to organize your menu items efficiently.
- Using the WordPress Customizer: Recommended for its real-time preview feature, making submenu creation even more user-friendly.
- Using a WordPress Plugin (Max Mega Menu): Ideal for those looking to create advanced mega menus with additional customization options.
Using these methods you can design your menu to your specific needs. Whether you choose the dashboard, the Customizer, or a plugin, your website will benefit from an organized and user-friendly menu system. So, go ahead, experiment, and create the perfect submenu for your WordPress site.
If you have any specific questions regarding the addition of a submenu in wordpress you can ask me via comment and I will be more than happy to assist you.
I just love the adding submenu using tha mega menu max plugin as it allows me to add submenu in wordpress with many different customization Thank you webtalkhub for Sharing such an insightful and helpful article
I am glad to help you 😊