Nothing can ruin a user’s experience more than landing on a 404 error page, “Page Not Found.” This can be frustrating and make a user lose interest in your website and leave it immediately.
You can avoid this by making sure that all your internal page links are correct and working, but this is not always possible when managing a large website. Sometimes, the 404 error can occur when a website visitor enters the wrong URL or the slug of one of the pages you modified or deleted.
This means the 404 error is unavoidable and can happen regardless of how well you maintain your website.
However, you can do something to help the user find the page they were looking for and keep them on your website. That is by creating a custom 404 page in WordPress.
In this article, I will show you how to create custom 404 error page in WordPress using a beginner-friendly plugin method, as well as using a page builder and custom coding.
Why You Need a Custom 404 Page and Its Importance?
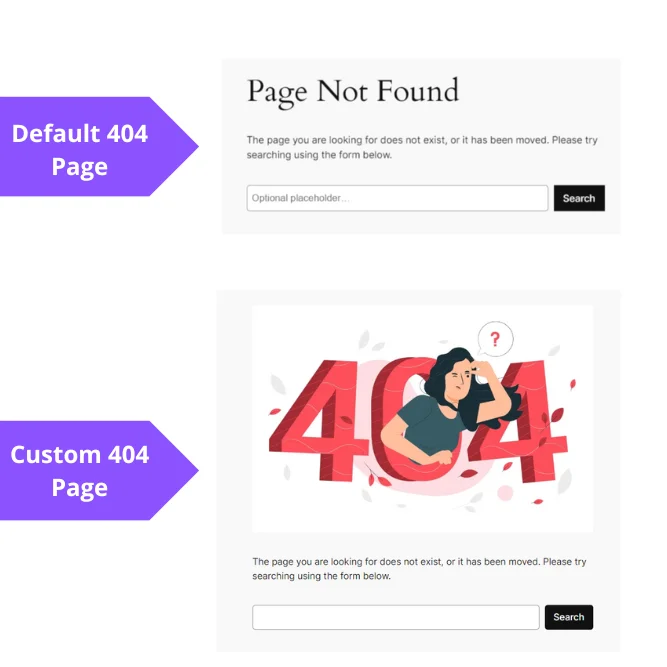
You may be wondering why you need a custom 404 page if there is a default 404 page available on the wordpress website well a default wordpress 404 page is very basic and does not guide the user well it just shows a simple 404 error message as shown below the image:

Whereas when you create a custom 404 page you can provide much information for the user and can turn their negative experience into a positive one.
With a custom 404 page, you can:
- Give useful tips and links, such as a search bar, a navigation menu, or a selection of popular pages
- Apologize and explain why the page they are looking for is not available, making your visitors feel more understood and appreciated
- Express your brand’s unique voice and style, making your site stand out and attract visitors
- Add some fun and flair, such as a witty message, a funny image, or a clever animation
- Motivate your visitors to take action, such as signing up for your newsletter, following you on social media, or reaching out to you for support
A custom 404 page is necessary on your website to guide the users with useful links if they encounter an issue as a result they will not bounce back and will spend time on your site which is good for SEO.
A custom 404-page can:
- Reduce your bounce rate, which is the percentage of visitors who leave your site after viewing only one page
- Increase your dwell time, which is the amount of time visitors spend on your site
- Improve your user signals, which are the indicators that search engines use to measure how users interact with your site
- Avoid soft-404 errors, which are when your server returns a 200 OK status code instead of a 404 Not Found status code, confusing search engines and hurting your site’s credibility
A soft 404 error occurs when a webpage looks like it’s functioning correctly, but its content suggests that the page is empty or does not exist. Essentially, it’s a page that should return a “not found” status but doesn’t, potentially leading to confusion for both users and search engines.
Redirecting your 404 errors to your homepage might seem like a clever way to avoid losing visitors, but it’s actually a bad idea. Google is smart enough to spot this trick and will treat it as a soft 404 error, which can hurt your SEO.
Instead of hiding your 404 errors, you should fix them or redirect them to a similar or relevant page or to a custom 404 page that offers useful links to your visitors. This will help them find what they are looking for and improve their user experience.
Yeah, it’s not a great practice (confuses users), and we mostly treat them as 404s anyway (they’re soft-404s), so there’s no upside. It’s not critically broken/bad, but additional complexity for no good reason – make a better 404 page instead.
According to John Mueller a Senior Search Analyst Google
Now that you know how important it is to have a custom 404 page on your website, let’s learn how to create one in WordPress. It’s easier than you think and it can make a big difference for your visitors and your SEO.
1) Create Custom 404 Page in WordPress Using Plugin
A plugin is an easy way to create a custom 404 page in WordPress and I recommend the Smart Custom 404 which is a free plugin and works with any theme.
It does not create redirects or extra server requests, which makes your site faster and SEO-friendly. It also sends a code 404 to the search engines, which tells them to remove the non-existent page from their index.
To create a custom 404 page in Smart Custom 404 follow the steps below:
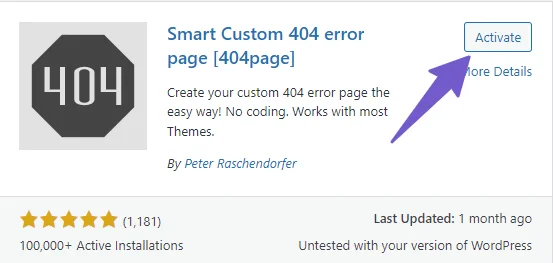
Step 1: Install and Activate Smart Custom 404 Plugin
To use this plugin, you need to install and activate it from the WordPress plugin directory which you can access by going to Plugins > Add New then search for Smart Custom 404 Plugin and install the one having the featured image as shown below:
Step 2: Create Custom 404 Page Using WordPress Page Editor
Then, you need to create a new page using the WordPress Page Editor by going to Pages > Add New Page and adding the content that you want to display on your 404 error page.
You can use any elements blocks like the search box, your recent post, and link to the homepage, etc but it should be meaningful you can add a message “404: Not all who wander are lost. Try another page, or maybe a bit of virtual hide and seek?” in the text block and also add search box.
Something like the image below:

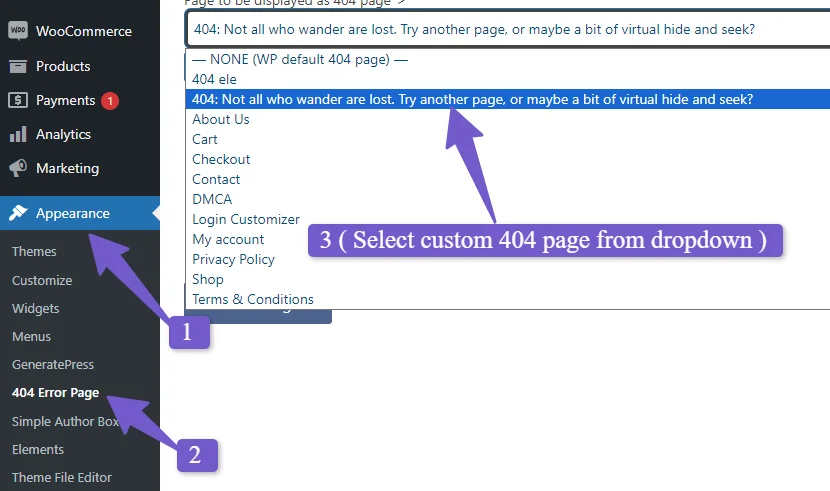
Step 3: Set the Custom 404 Page
After creating your custom 404 page, go to Appearance -> 404 Error Page and select the page that you created as your custom 404 error page. Click on Save Changes and you are done.
And that’s it now, whenever a user misspelled or visits a non-existent URL on your site, they will see your custom 404 page instead of the default one.
This custom page will appear when a user enters the wrong website URL or tries to access a deleted or modified page. This page will help them navigate to other site content and show them a friendly message that the page they are looking for does not exist.
However, if you want to fix the 404 errors that occur when the post or page is not found or its permalink is changed, you need to use 301 Redirect. You can check our detailed guide on 301 redirects to learn how to do it.
2) Create Custom 404 page in WordPress Using Page Builders
If you are using a WordPress block theme or any popular page builder like elementor or Divi you can easily make a custom 404 page.
So first let’s start with the wordpress block editor.
Create Custom 404 page Using WordPress Block Editor
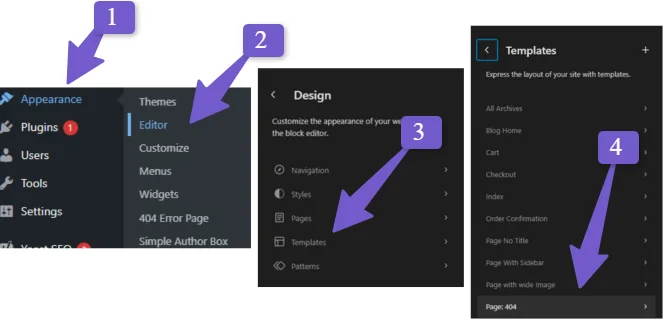
If you are using a block theme in WordPress, such as the default theme Twenty Twenty-Four, Twenty Twenty-Three, or the popular BlockPress theme, you can easily create a custom page using the site editor.
To do this, go to your WordPress dashboard and then click on Appearance > Editor. Once the theme editor is opened, select the Template option. After that, scroll down and you will see the 404-page template.
Clicking on it will open the 404 page of your site. Now you can change the text and add image blocks or your recent posts, etc. according to your design preferences. And that’s it, you have created a custom page using the WordPress block editor.
A preview of the comparison between the default and custom 404 page is shown below:
Create Custom 404 Page Using Elementor Page Builder
There are two versions of elementor page builder pro and Free and I am covering both for creating custom 404 pages.
For Elementor PRO Version
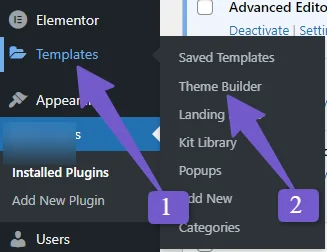
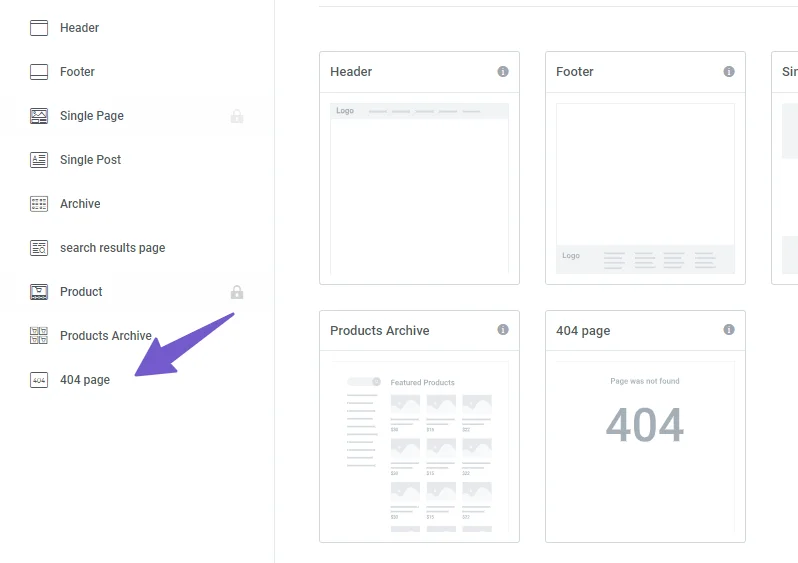
Creating a 404 error page is very simple if you are using the pro version of Elementor. You just have to go to Template > Themebuilder and find the 404 page option. Click on it to edit and design it according to your specific needs.
You can also use a prebuilt 404 page from the Elementor library. Once you are done, click on publish and you will see a popup where the 404 page is already selected.
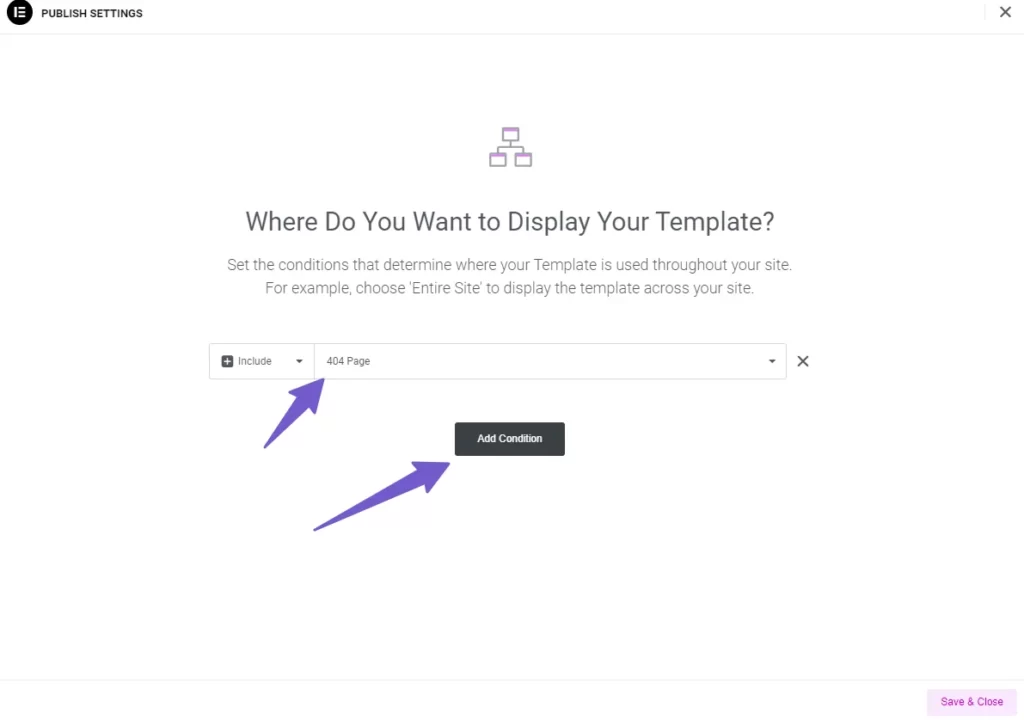
Click save and your 404 page will be shown to users when they encounter any error on your website.
For Elementor Free Version
If you are running your site on the free version of Elementor, then there is also a method for you. Create a new page by going to Pages > Add New and then click on Edit with Elementor. Once your page is opened in the Elementor editor, design the page as you like.
For the illustration of a 404 page, you can check sites like Freepik and search for 404 illustrations. There are many options to choose from. Select the one that users can easily understand that it is a 404 page.
I have used this yellow one as you can see in the image below.
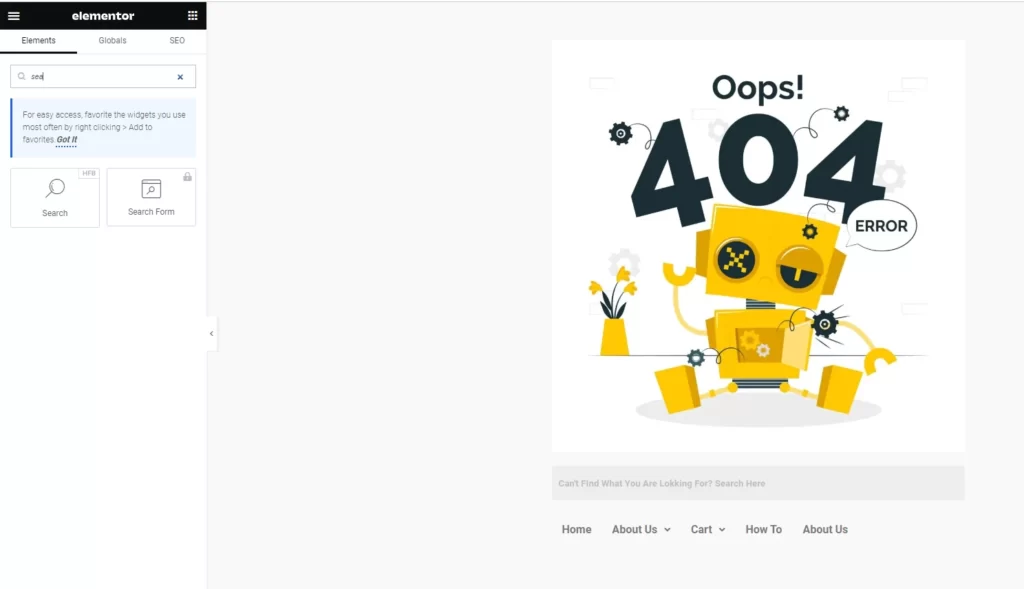
I have also added a search box and a nav menu to it. The search box and nav menu can only be added if you install the Header and Footer Builder plugin with the Elementor free version. After that, once you publish the page,
Then you have to install the Smart Custom 404 plugin as we did in the first method. In the plugin settings, you have to select this 404 page as your default 404 page.
As we are now using two plugins to get the job done, I recommend buying Elementor Pro if you want all the functionality in one plugin and also some other cool features. You will not regret your investment in it.
Create Custom 404 page Using Divi Page Builder
If you are using Divi as your page builder, then creating a custom 404 page is similar to that of Elementor with a slight change in the process.
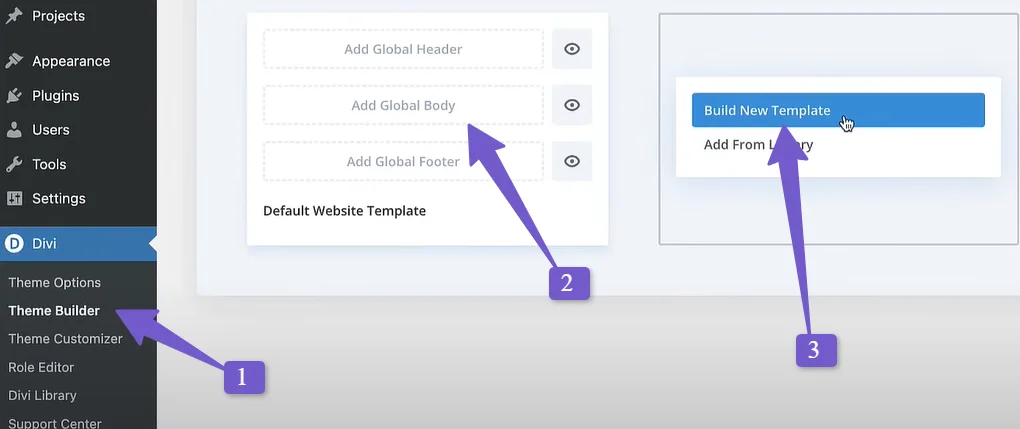
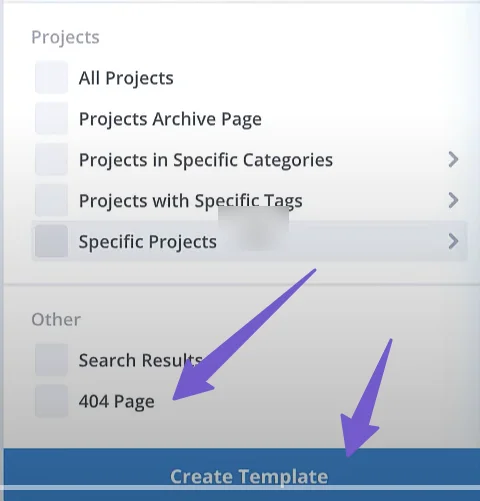
First, go to DIVI > Theme Builder and then click on the Build New Template. A popup will appear. Scroll down and click on the 404 page to create it.
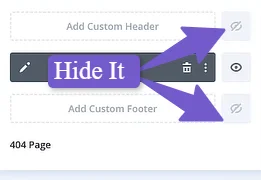
Then, you will have to hide the Add Custom Header and Custom Footer options and click on the Custom Body.
Now, you will have to select either Build Custom Body or Add From Library. If you are good at customization in Divi, then you can build one for yourself from the Custom Body.
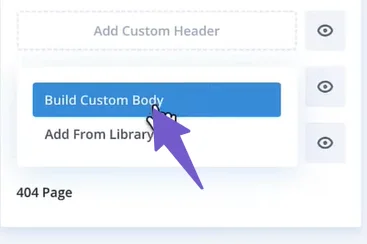
If not, you can select the Add From Library option and choose a premade 404 page from there. And you are done.
A preview of the custom 404 page in DIVI is shown below:

3) Create Custom 404 page in WordPress Using Coding
If you are a coder or know a bit of coding and don’t want to install an extra plugin for creating a custom 404 page, you can easily edit your 404 page in WordPress by modifying the default 404 page in your theme files.
To do this, go to Appearance > Theme File Editor and locate the 404 page. Click on it to edit it. Now, to be safe, if anything goes wrong, you can backup your website or you can simply copy the code on the 404 page and paste it into a notepad. After that, add the following code to your 404 page:
<?php get_header(); ?>
<div id="primary" class="content-area">
<main id="main" class="site-main">
<section class="error-404 not-found">
<header class="page-header">
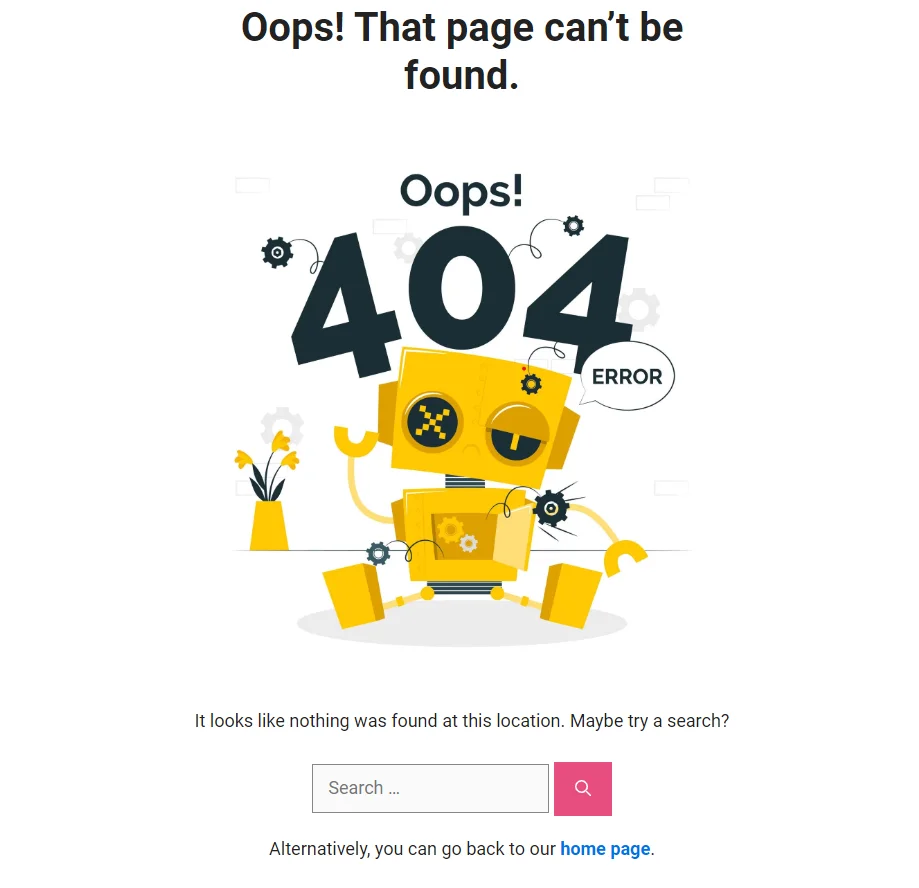
<h1 class="page-title"><?php _e('Oops! That page can’t be found.', 'yourtheme'); ?></h1>
</header><!-- .page-header -->
<div class="page-content">
<img src="http://tipslaptop.com/wp-content/uploads/2023/11/5203299.jpg" alt="404 Image" style="max-width: 100%; height: auto;">
<p style="margin-top: 20px;"><?php _e('It looks like nothing was found at this location. Maybe try a search?', 'yourtheme'); ?></p>
<?php get_search_form(); ?>
<!-- Additional content or styling can be added here -->
<p style="margin-top: 20px;"><?php _e('Alternatively, you can go back to our', 'yourtheme'); ?> <a href="<?php echo esc_url(home_url('/')); ?>" style="color: #0073e5; font-weight: bold;"><?php _e('home page', 'yourtheme'); ?></a>.</p>
</div><!-- .page-content -->
</section><!-- .error-404 -->
</main><!-- #main -->
</div><!-- #primary -->
<?php get_footer(); ?>
You have to change the image URL and also you can change the text in the code. And that’s it! You have created a custom 404 page in WordPress using coding.
You can see the preview of the page in the image below:
SEO Impact of a Custom 404 Page
A good custom 404 page is so important for your website as it can help the users navigate back to the site if they encounter an error. The custom 404 page is designed in such a way that it guides the user to other useful content on the site.
Doing so will keep the visitors on the website, reducing the bounce rate of the website. Also, it can make your brand or website stand out if it is unique and creative because these small details can make a difference in the users’ eyes.
Not only does a custom 404 page improve the user experience, but it can also impact positively on the entire site’s SEO. Because of the well-structured and relevant content on the 404 page, the user will be able to find their way back to the site after encountering an error.
This will improve the site’s dwell time (the amount of time the user spends on the page before returning back to Google), which is a positive signal. Google will consider your site helpful in terms of user experience, which will improve the overall SEO of your site.
Personally, when I encounter a very bad and default 404 page on any site, I usually go back to the search, because I don’t want to be stuck and I find it better to go for another site.
So having the best and optimized custom 404 page is a must in these times when the attention span of people is very low because of reels and short content from TikTok and YouTube reels.
FAQs (Customize 404 Error Page in WordPress)
Below are some common faqs related to Building a Custom Not Found Page in WordPress.
Why Custom 404 Page is Important for SEO?
Custom 404 pages help SEO by improving user experience and reducing bounce rate. They offer helpful links, relevant information, or a search box to guide the user. They also show your brand personality and tone of voice, which build trust and loyalty.
Should you redirect to a 404 page?
No, you should not redirect to a 404 page. A 404 page is a page that shows an error message when the requested URL does not exist. Redirecting to a 404 page means sending the user or the search engine to a page that does not have any useful content. This can create a bad user experience and hurt your SEO.
Instead, you should use one of these options:
- Redirect to a relevant page on your site that has similar or related content to the original URL.
- Create a custom 404 page that has helpful links
Conclusion
We have learned the process of creating a custom 404 page using different methods. For beginners, we recommend using plugins and page builders, while advanced users can opt for a method involving code. Choose the approach that best fits your needs.
I understand that, even after explaining the concept clearly, users might get stuck at a step or have unique and specific questions. Feel free to ask me about it in the comments, and I will be happy to help you find a solution.
So, what are you waiting for? Let’s create an engaging and user-friendly custom 404 page for your website by following the guide.