If you are wondering how to export WordPress posts with images, then you have come to the right place.
If you need to transfer the blog post with their featured image and internally placed images, but it is not possible with the WordPress default importer or exporter. The default export and import feature only exports posts and pages in an XML file, a text file, and only puts the image URL in the file.
You can manually put the featured images later, but it is tedious work, and if you have a large database of posts, then it is so much work, plus there are chances of error.
So, we will learn in this article how to export WordPress posts with images. The method is relatively easy, and you don’t need any technical knowledge to follow the tutorial. So let’s get started
Note: Export is not a backup, so before proceeding with the tutorial, take a backup of your site to be on the safe side if anything goes wrong.
Backup your Site using our guide on backing up WordPress site for free.
Method 1:Export WordPress Posts with Images Using Bulk Post Editing Plugin
Exporting WordPress post using the Bulk Post Editing plugin by iThemelandco Although its a new plugin and have very few downloads it do the job more reliably than the popular plugin choices we have in the WordPress library and that’s why it’s my personal favorite and recommended method as it allows a smooth exporting and importing of WordPress post without losing any internal content and images.
So let’s get started on how you can export your entire blog post including the internal and external links and images.
First, we need to install the plugin so go to your WordPress dashboard and then Plugins > Add New and search for “Bulk Post Editing” by iThemelandco You can see the plugin image below:
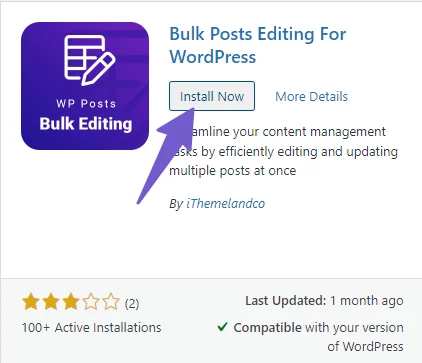
Once you find it and install and activate it you will have an Icon for it in the WordPress dashboard sidebar as shown in the image below. Click on it and it will open plugin settings.
Now just skip the first step and in the upper right corner select the number of posts you want to show on the interface I want to show all so I select the 100.
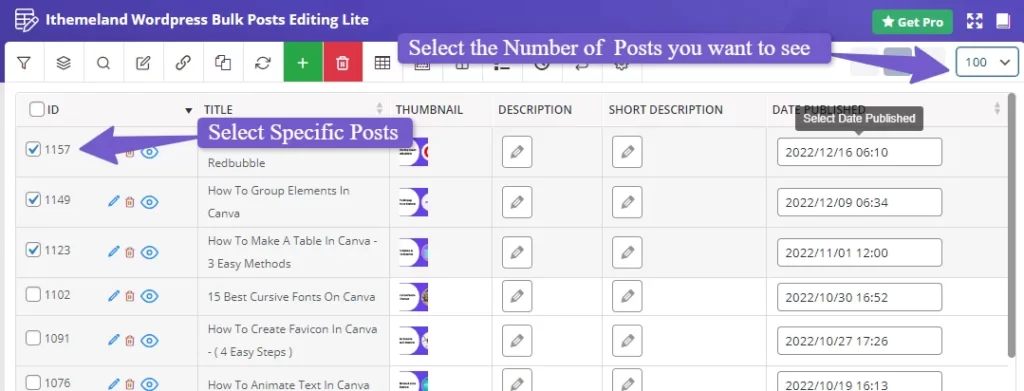
If you want to export all the posts then click on the checkbox in the top to select all the posts. If you want only specific posts to be exported you can select the checkbox next to the post.
Now click on the Export icon at the top menu as shown in the screenshot below:
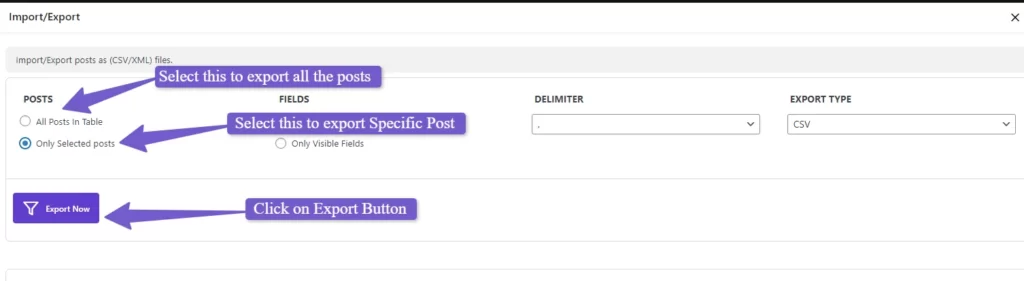
Once you click on the export icon you will have a popup Leave all the settings as they are and only select “only Selected post” because we want only the selected post to be exported If you want all the posts to be exported then leave it on the option “All Posts in the Table” and click on Export Now Button.
As we have successfully exported the post with images now we have to import it on our new website for this first we have to install an XML importer plugin by smackcoders to install it just search “WP ultimate csv importer” in the WordPress plugin library and install the one made by smackcoders. The plugin image is shown below:
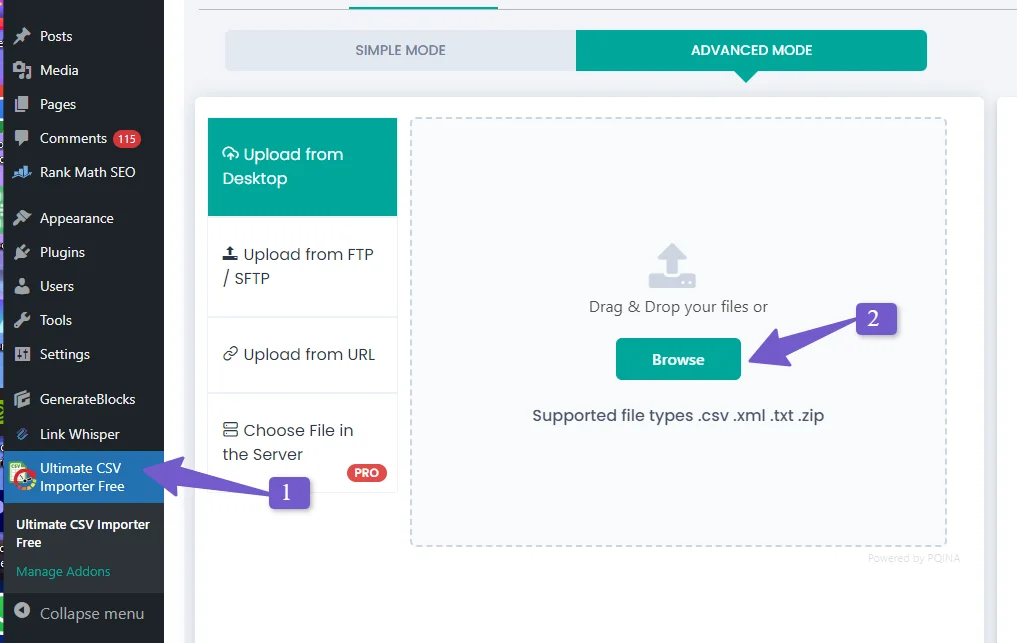
Now go to the plugin settings from the WordPress sidebar and click on browse to upload to import the CSV file of the blog post we exported earlier.
Once the file is exported you will have a Step by Step wizard in the first step it will automatically select Posts but if not you can Select it “Posts” and click Continue.
In the next step, you have to make 3 changes in the Title section Select “Post title ” from the drop-down.
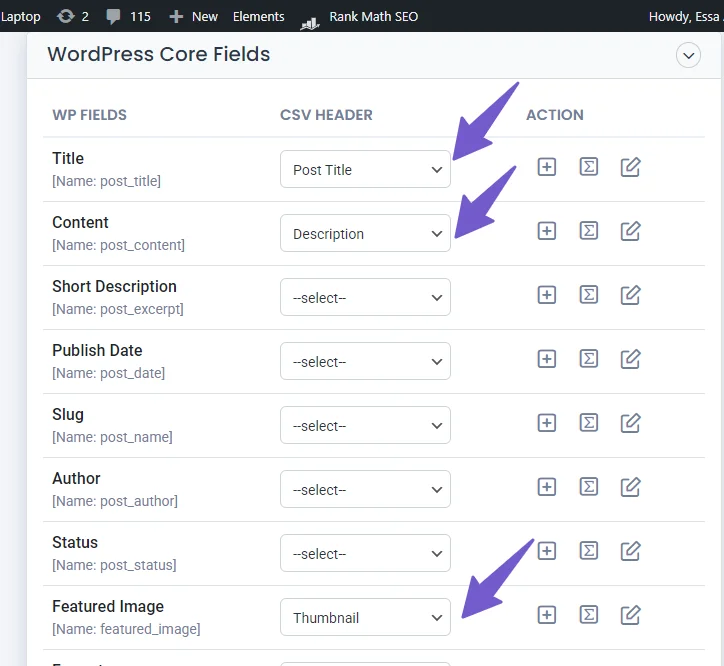
In the Content Section select “Description” from the drop-down and in the Featured Image section select “Thumbnail” from the drop-down and leave the other option as it is click Continue and again click on Continue.
After that you will have the option to switch the site to maintenance mode while importing If you want to you can check that option if not click on Start Import and your import will start.
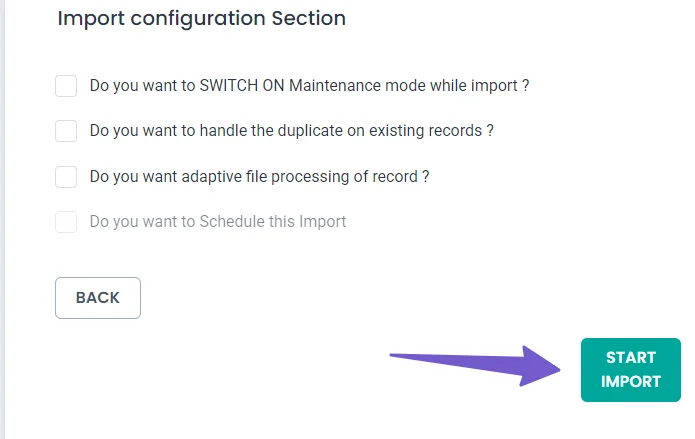
The time it will take will depend on the number of posts you have on the import File once done head back to your Post in WordPress and you will see all the new posts you have just imported.
This method will do the work for you and it’s a reliable and easy one but If you encounter issues, consider trying an alternative method.
Method 2: Export WordPress Posts With Images
As we discussed earlier, WordPress has its built-in Tool, which is used for exporting and importing WordPress pages and posts. Still, it has a limitation as it can’t export the blog post with featured images and images placed within the article.
So here, we will use a plugin to modify the functionality of the default wordpress importer and exporter tool.
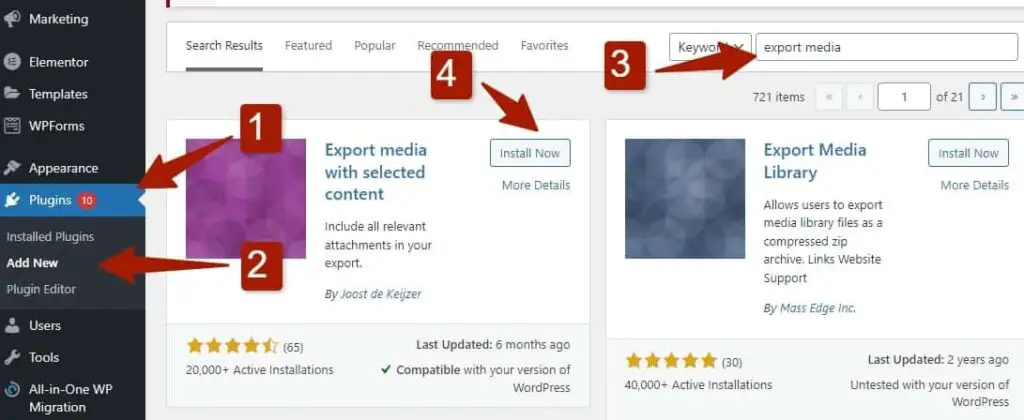
Navigate to WordPress dashboard and Go Plugin > Add New and search for “Export media with selected content” once you find install and activate it.
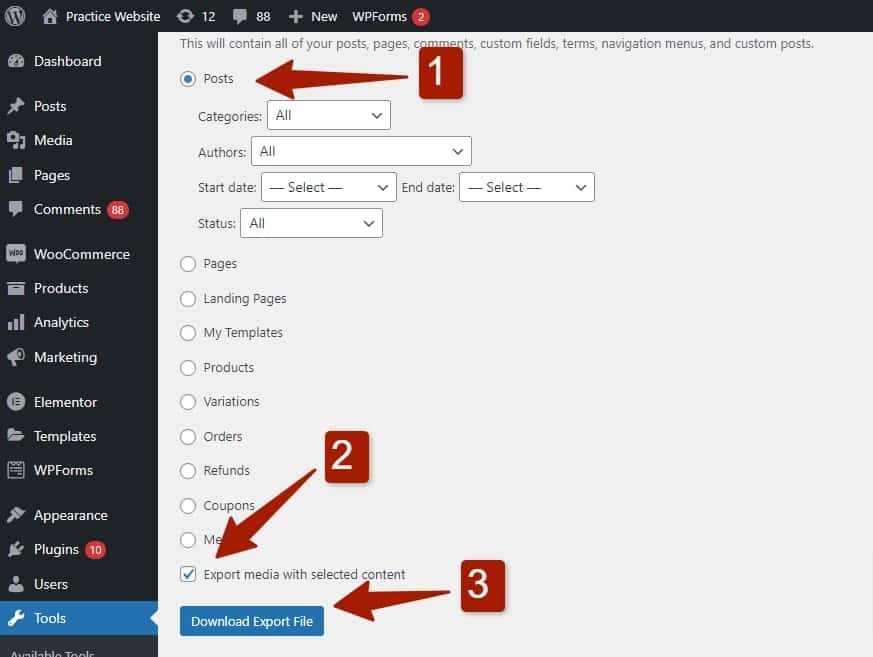
Then Navigate to Tools > Export
Here, you will find different options to select from, but our concern is with a blog post. So, choose Posts and tick the “export media with selected content” box.
Now click on the Download Export File. It will download the backup of your post with the featured images and all the images in the blog.
Note: If you have a large site and many blog posts, try to export the blog post in 2 o 3 batches by selecting the date range as something during import large file can not be uploaded due to timed out issue, so it is recommended to export the blog post in batches.
Import WordPress Posts With Images
Once you export the blog post with featured images from your old WordPress site.
In your new site, Navigate to Tool > Import and import the earlier exported file.
Doing so will import the blog post with their featured image to your new website.
Problem with Exporting WordPress Post with Images
If you do every step correctly, there might still be a chance of error, so below, we will discuss the 2 most common mistakes in exporting your WordPress blog post with featured images and images.
1) The Theme is doesn’t attach the media to your blog post or page
Usually, when we upload the image to the blog post, it is attached to the blog post, but some themes don’t attach the images to the blog post and pages.
So when we export the blog post, even with the Plugin, it will only export the text and not the images as they are not attached with the blog post.
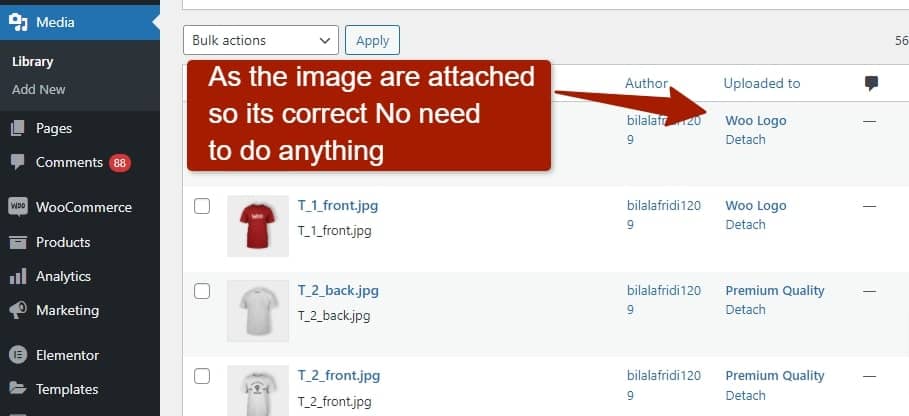
To solve this issue, first, check whether my theme attached the images to the blog posts or not. So for this, Navigate to Media Library and look for the “uploaded to” column in the “list” view.
If it is attached to the blog post, you don’t have to do anything if it is correct, but by default, the images are not attached to the blog post.
Then the best option is to change your theme to get the functionality of automatically inserting images into blog posts. The default WordPress theme can also do the job.
Once you change the theme, update all the blog posts, and you will be able to see in the “uploaded to” column the images will be attached to the blog post.
2) The Old Exported Site is Not Live While Importing the Blog Post to New Site
If you export the WordPress blog post using the default WordPress exporter, it will only export the text and only the image URL.
So once you import the file to your new website, the importer goes to each image location from the URL and downloads it to the media library.
You May Like: Download Images from the media library in WordPress
If you export the blog post using the default exporter and take down the old site, when you import the file in your new website, it will not fetch the images from the URL in the XML file as you have taken down the old website.
So, if you plan to use the default wordpress exporter for exporting wordpress blog posts with featured images and other images, don’t take down your old site before importing the exported file to your new website.
Note: We recommend using the Plugin for exporting the blog post with images as it will not require the old site to be live to import the blog post with images.
Method 3: Export Specific Blog Posts in WordPress
If you want to export a specific category post, what will you do?. Suppose you have 20 blog posts and want to export only 10 posts.
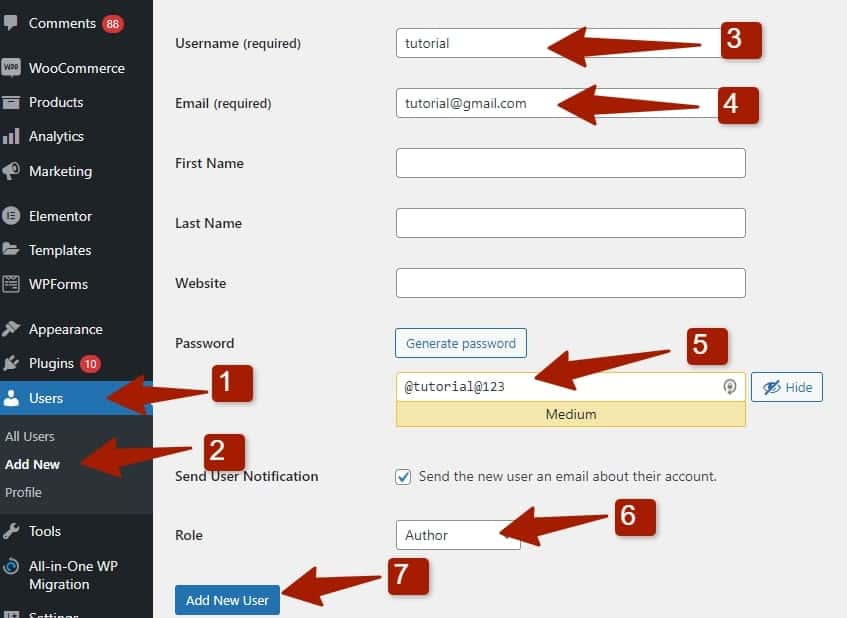
So for this, first add a new user to wordpress by navigating to User > Add new, then create a dummy user having an author role.
Name the New User whatever you want, generate a password, and save it.
Once you are done creating the new User, go to the posts and change the author of every post with the new author you have just created and update posts.
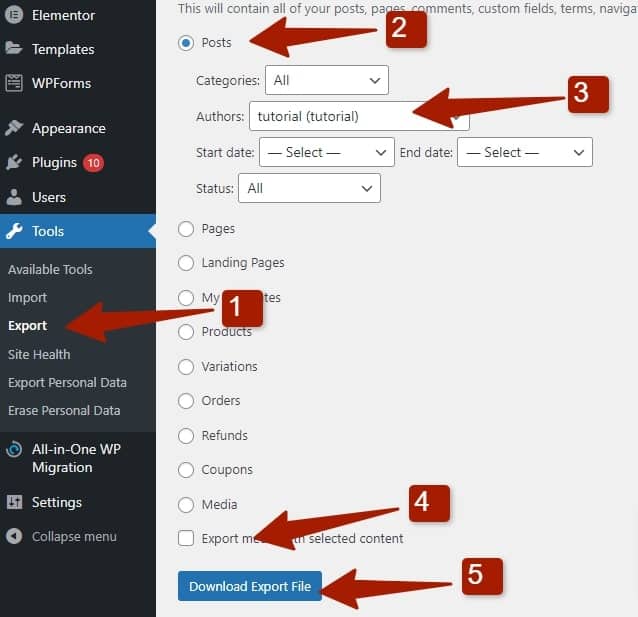
Once done, Now go to the Tool > Export and select “Posts,” but under the post, option select the new User in the Author box and tick the “Export media with selected content” checkbox.
Now export the file, and it will only export the post assigned to the new User, which will help you if you need to export only specific blog posts.
FAQ(Export WordPress Posts With Images)
Below are some of the common questions you might have in mind regarding the exporting and importing of blog posts from the old website to the new one.
How to Export WordPress Posts With Images?
Export WordPress posts with images efficiently using the Bulk Post Editing plugin by iThemelandco. Install and activate the plugin, select the posts you want to export, and use the plugin’s export feature. Then, import them into your new site with the “WP Ultimate CSV Importer” plugin by smackcoders. It’s a reliable and straightforward process for transferring posts and images.
How to Export images from WordPress content?
If you want to export the media library of WordPress, then WordPress has a default function to do your job.
Simply go to Tool > export and select “media,” It will create an XML file.Xml file is a text-based file where your website image URL will be listed.
Once you import the exported XML file to your new website, it will fetch the images from the URL in the XML file.
But you have to keep the previous website live till the images are fetched from there; otherwise, it will not work.
How to download images in bulk from WordPress?
If you are trying to download all the images from WordPress in bulk, you have to go to the Cpanel of your WordPress website and, in the file manage under the “wp-content,” locate the “uploads” folder.
From the upload folder, you can download each image or download folder by folder or download the whole upload folder.
Conclusion
Exporting your WordPress post and pages is simple by using the default WordPress export and import feature but is only recommended if you only want text as the featured image and the images within the article are not exported using this method.
Hence we recommend using the Plugin mentioned in this tutorial to ease your work. Hopefully, after reading our guide on how to export WordPress posts with images, you will be able to export your website blog posts with images
But still, if you have any confusion, you can ask via comment, and we are happy to help you out.