Websites are typically created to showcase content to the public, but what if you have a specific need to hide your website from the public eye, making it accessible only to authorized users?
So, If you are looking for a way to make wordpress site private, you have come to the right place. In this guide, I will show you ways to make your entire WordPress site private or just certain parts of it, also I will explain why making your WordPress site private can be beneficial and what advantages it can bring to your online presence.
Why Make Your WordPress Site Private?
Keeping your WordPress blog completely private means that only specific people you choose can see it. There are a few good reasons why someone might want to do this:
- Privacy: You might want to write personal stuff or share information that’s only meant for certain people, like family or friends. Making your blog private keeps it away from the public eye.
- Testing and Development: Sometimes, you need to work on your blog without others seeing it. This is especially true if you’re making big changes or fixing problems. Keeping it private lets you do this.
- Membership or Paid Content: If your blog has special content that’s only for members or paid subscribers, you want to hide it from those who haven’t paid or signed up. Making it private helps with that.
So, making your WordPress blog private is about controlling who can see your content for various reasons like privacy, testing, or offering exclusive content.
Benefits of Making Your WordPress Site Private
There are many benefits of making your wordpress site private some are mentioned below:
- Privacy: Your Confidential data or information will be safe as only individuals having access to the content will see the data and information and will keep the public from accessing the data.
- Content Testing and Development: Private sites help you test new features or fix bugs on your site without interference from public visitors.
- Exclusive Content: Private Sites allow you to only share exclusive content with authorized users.
- Security: As private sites are not accessible by all the users it is less prone to security breaches as you will have tighter control over who can access the site content so less malicious activity.
- Protection of Sensitive Information: If your website deals with customer personnel information and other sensitive business data then making it private will add an extra layer of security to it.
- Selective Sharing: Private sites allow you to share content selectively to specific groups of authorized users making it easy for you to manage exclusive content sharing without exposing it to the public.
- Easy Website Maintenance: Under under-construction website or a part of the website can be made private for easy revamp without showing the incomplete or imperfect layout to the website visitors.
So as we have learned the benefits a private site can give let’s get started on making your wordpress site private.
Make the Entire WordPress Site Private (3 Ways)
First I will show you how you can make your entire site private by using a plugin or without a plugin (using code) method.
1) Making the Entire WordPress Site Private using Plugin
To make your entire site private using a plugin is the best and easiest way. It reduces the chances of making mistakes, and even a novice user can do it.
Here’s how you do it:
- Go to your WordPress dashboard.
- Find ‘Plugins’ on the sidebar, and click on ‘Add New.’
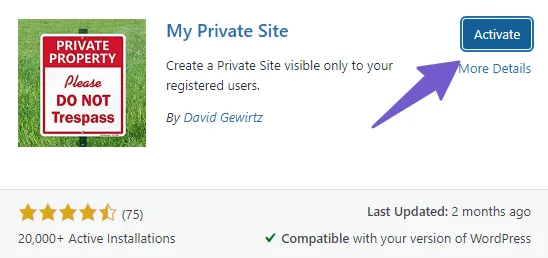
- In the search bar, look for the plugin called ‘My Private Site.’
- Install and activate this plugin. You’ll see an image of the plugin to help you choose the right one.
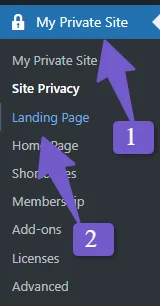
Once the plugin is installed: In the WordPress sidebar, click on My Private Site > Site Privacy
There, you’ll find a checkbox that says ‘Enable Login Privacy.’ Check it. Click the ‘Save Privacy Status’ button below.
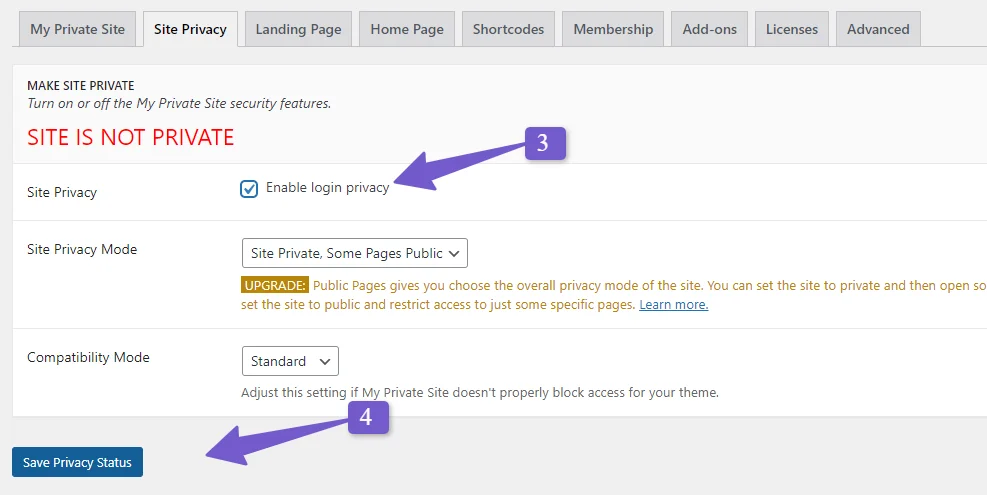
By doing this, your site becomes private, and regular users won’t be able to access it.
Now, you might wonder how to give access to specific users. I’ve just shown you how to make the entire site private. Now, let’s learn how to allow selected users in.
There are two ways to do it:
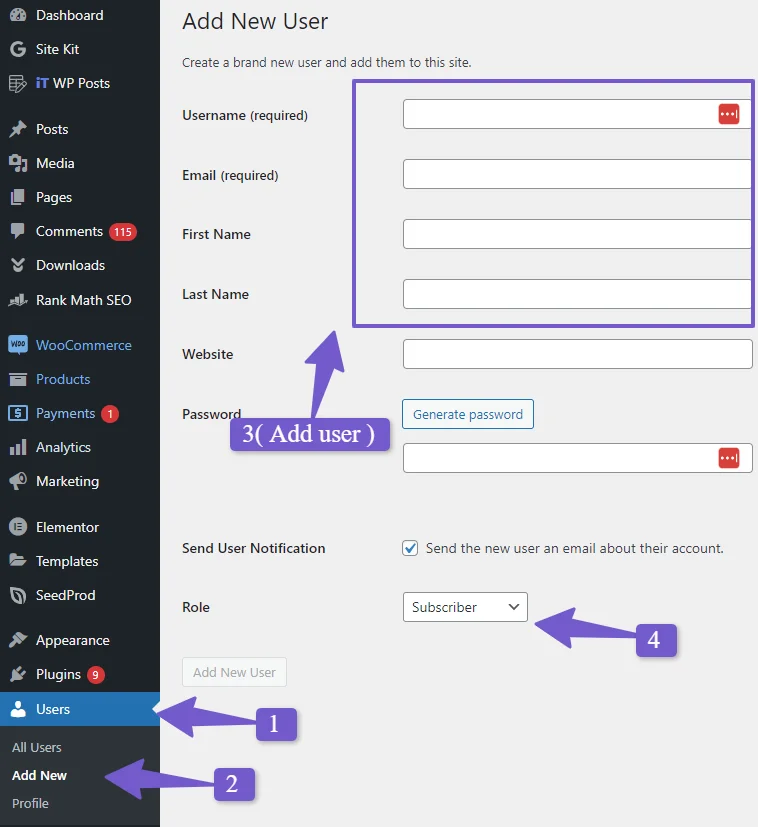
1) You can manually add users as subscribers. Go to the ‘Users’ section in the WordPress sidebar, click ‘Add New,’ enter their email, and assign them the ‘Subscriber’ role.
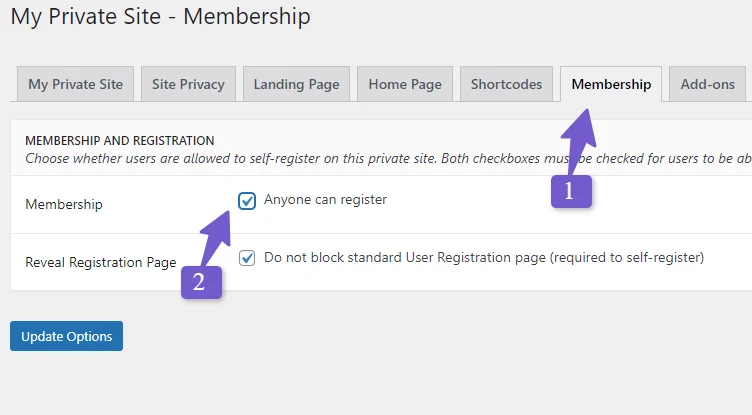
2) Alternatively, you can let users register themselves on the login page. To do this, go to the ‘Membership’ tab in the ‘My Private Site’ plugin settings. Check the option that says ‘Anyone can register.’ This way, users will have the option to register and access the site’s content.
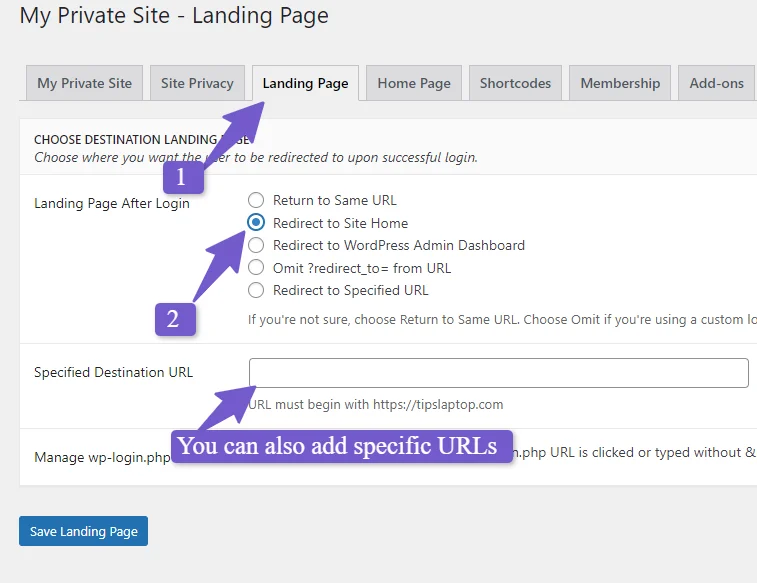
The My Private Site plugin also allows you to redirect users to a specific URL after they log in. You can set this up in the ‘Landing Page’ tab.
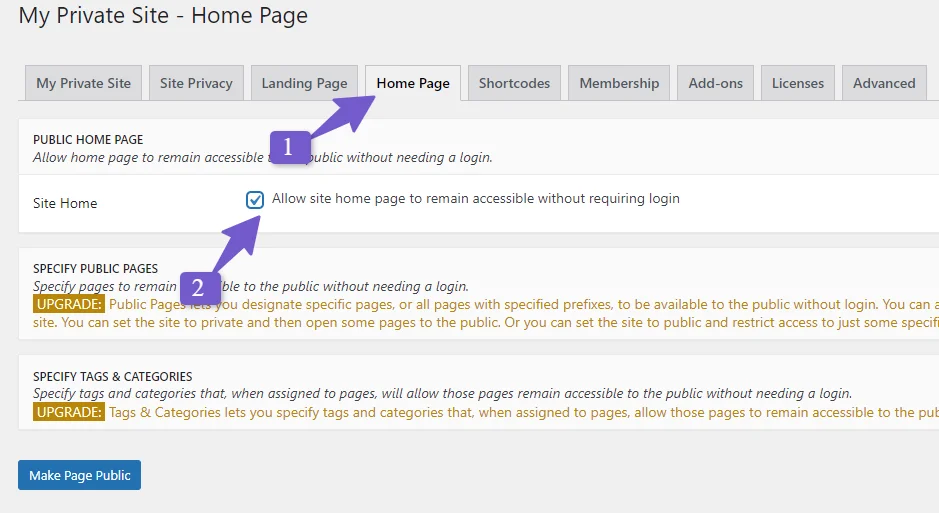
In the ‘Home Page’ tab, you can choose to show users only the homepage of your site. This can be a good way to tell them that they need to contact you for access to private content, which you can monetize in various ways.
2) Making the Entire WordPress Site Private Without Plugin (Using Code)
Using a plugin is the easy and recommended way to make your site private. But if you don’t want to use a plugin and prefer to add some code to your theme’s function.php file, you can do that too. Don’t worry if you’re not familiar with coding—I’ll provide you with the code you need.
Here’s how to do it:
Go to Appearance > Theme File Editor

If your Theme File Editor option is showing then you are good to go if you can’t see the Theme File Editor option You can troubleshoot the Theme File Editor not Showing in WordPress.
After clicking on the Theme File Editor Look for the function.php file in the right sidebar. Sometimes, it’s found under the ‘Theme function file.’
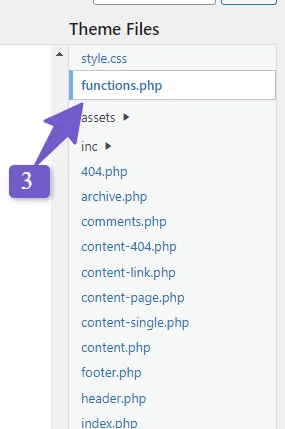
Once you find it, scroll down to the end, and add the following line of code:
function make_wordpress_site_private(){
  global $wp;
  if (!is_user_logged_in() && $GLOBALS['pagenow'] !== 'wp-login.php'){
    wp_redirect(wp_login_url($wp -> request));
    exit;
  }
}
add_action('wp', 'make_wordpress_site_private');
What this code does is it redirects every user who tries to access your site to the login page. They can sign in using the credentials you’ve created for them. If you remove this code, your site will become public again.
Now, if you’re developing your site and only want a few authorized developers to access it, you can use a more robust code that will show unauthorized users a ‘403 Forbidden’ page.
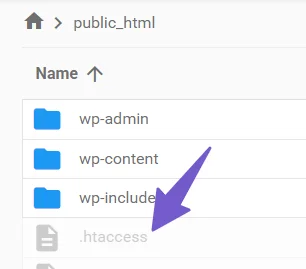
But this code will be added to your site .htaccess file which you can find by going to your File Manager in cPanel and there in the public_html (root folder) you will find the .htaccess file so add the following line of code there.
order deny,allow
deny from all
allow from 123.45.67.89
Replace ‘123.45.67.89’ with your own IP address. If you want to add multiple IPs to access the page, you can add them below, like this:
order deny,allow
deny from all
allow from 123.45.67.89
allow from 111.222.333.444
allow from 555.666.777.888
This way, you can allow multiple IPs to access your site.
Note: This code will only work if your website run in Apache
3) Make your Entire Site Private From Search Engines
If you only want to keep your site away from search engines so they don’t index your content and add it to their database, then this method is what you need.
Here’s how to do it:
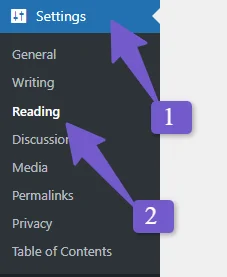
- Go to your WordPress Settings, then click on ‘Reading.’
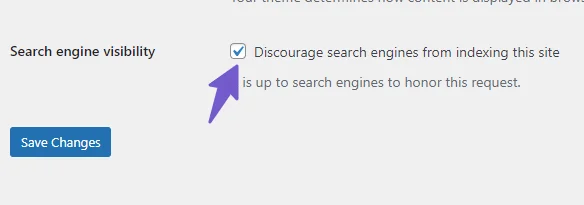
- Scroll down, and you’ll find a checkbox that says ‘Discourage search engines from indexing this site.’
- Checking this box will tell search engines not to include your site in their listings. However, keep in mind that it’s not guaranteed that all search engines will follow this request.
You May Like :
How to Backup WordPress Site for Free
How to Unpublish WordPress Site
Make WordPress Post and Page Private
We’ve covered how to make your entire WordPress site private, but what if you only want to hide a specific part of your content, like a post or a page, and make it accessible only with a password? Let’s learn how to do that.
How to Make a WordPress Page Private:
1) First, find the specific page you want to make private and click on ‘Edit.’
2) Once the WordPress editor is open, look for a section called ‘Visibility’ on the right sidebar, under ‘Summary.’
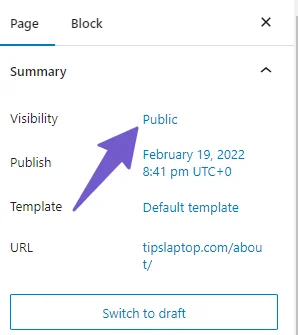
3) Initially, the visibility is set to ‘Public.’ Click on it, and you’ll see two other options: ‘Private’ and ‘Password Protected.’
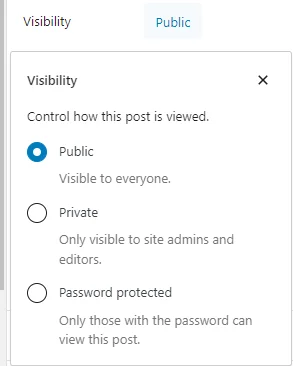
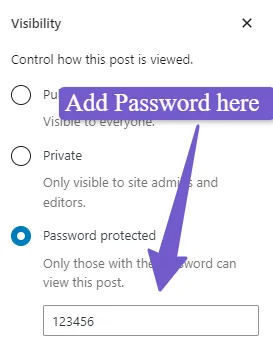
4) Choose ‘Password Protected,’ and you can add a password. This way, only users who know the password will be able to access your WordPress page.”
How to make wordpress Blog Post Private
To make a WordPress blog post private, follow these steps:
1) Locate the specific blog post you want to make private and click on ‘Edit.’
2) After opening the WordPress editor, you’ll find a section called ‘Visibility’ on the right sidebar, under ‘Summary.’
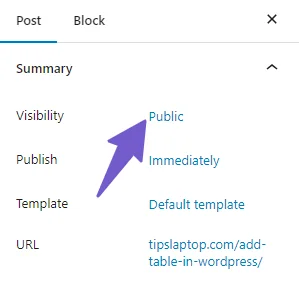
3) By default, the visibility is set to ‘Public.’ Click on it, and two other options will appear: ‘Private’ and ‘Password Protected.’

4) Select ‘Password Protected,’ and you can set a password. This way, only users who know the password will be able to access your WordPress blog post.

Now, your WordPress blog post is private, and only authorized users, like administrators and editors, can see it. If you choose the “Password Protected” option, you’ll need to share the password with those you want to grant access to the post.
FAQ(Make WordPress Site Private)
Below are some most common FAQs related to making your wordpress site private.
How can I make my wordpress website private?
To make your WordPress website private, use the ‘My Private Site’ plugin. Go to your WordPress dashboard, click ‘Plugins,’ then ‘Add New.’ Search for ‘My Private Site,’ install, and activate it. Open the plugin, choose ‘Site Privacy,’ check ‘Enable Login Privacy,’ and save. Regular users won’t access your site. To grant access, either add users as subscribers or enable self-registration in the ‘Membership’ tab.
How to make a WordPress site private during development?
To make your WordPress site private during development:
- Go to ‘Appearance’ > ‘Theme File Editor.’
- Locate ‘function.php’ on the right sidebar.
- Add this code:
function make_wordpress_site_private(){
  global $wp;
  if (!is_user_logged_in() && $GLOBALS['pagenow'] !== 'wp-login.php'){
    wp_redirect(wp_login_url($wp -> request));
    exit;
  }
}
add_action('wp', 'make_wordpress_site_private');
This code redirects visitors to the login page, ensuring privacy. Remove it to make your site public.
How do I hide my WordPress site from Google search?
To hide your WordPress site from Google search, use the ‘Discourage search engines from indexing this site’ option in your WordPress Settings > Reading. However, note that it’s not guaranteed to work, as search engines may or may not honor this request.
Wrapping Up
In this article, we have explored the importance of making your WordPress site private. I have shown you methods to achieve this, including using a plugin or code. Additionally, we discussed how to prevent search engines from accessing and indexing your site.
We also covered the process of making specific pages or posts private, providing you with greater control over content accessibility.
I hope that after reading this article, you are now capable of making your entire site or specific parts of it private. If you have any questions regarding making your WordPress site private, please feel free to ask in the comments, and I will be delighted to assist you.