If you are an online store owner and using WordPress WooCommerce platform, you know how crucial product images are for attracting customers and making sales. However, sometimes the default image sizes in WooCommerce may not meet your specific needs or the design requirements of your website. That’s where knowing how to change product image size in WooCommerce comes in handy.
Whether you want to make your product images larger or smaller, in this guide, I’ll walk you through the process of resizing product images both on shop page and single product page, and I’ll do it in a way that’s easy to understand.
Resizing your product images can make a big difference in how your website performs, how your products are being displayed, and how your customers experience your online store. So, let’s dive in and learn how to easily adjust WooCommerce product image size.
But before we jump into the solution, let’s first explore what can be the ideal image size or we can say recommended size for your WooCommerce products, which will enable you to effectively showcase your products on your WooCommerce shop and will provide a visually appealing experience for your customers.
Also Read: How to Disable Featured Image Auto Crop in WordPress
What is the Best Image Size for WooCommerce Products?

The image size you choose for your WooCommerce products can greatly impact the user experience and sales. The recommended size is 800 pixels by 800 pixels, as this size provides a clear view of the product details and ensures fast loading times. However, you may need to adjust the size based on your specific needs. Additionally, using a square aspect ratio (1:1) for your product images is often a common practice, as it allows for consistency and a cleaner layout.
However, it’s important to note that 800 pixels by 800 pixels maybe the recommended size, but you might need to adjust the size depending on your specific needs. For example, If your products have lots of details or are high-end, using larger size images can showcase product’s features better.
And lastly, optimize images for SEO with descriptive file names and alt tags. By selecting the right size, focusing on quality, ensuring responsive design, and optimizing for SEO, you can showcase your products effectively and boost sales in your WooCommerce store.
Now that we’ve explored the recommended image size for WooCommerce products, let’s proceed into the process of resizing both the single product page featured image and the shop page product thumbnail image:
1) Resizing Single Product Page Featured Image in WordPress
To resize the single product page featured image in WordPress, follow these steps:
- Log in to your WordPress dashboard.
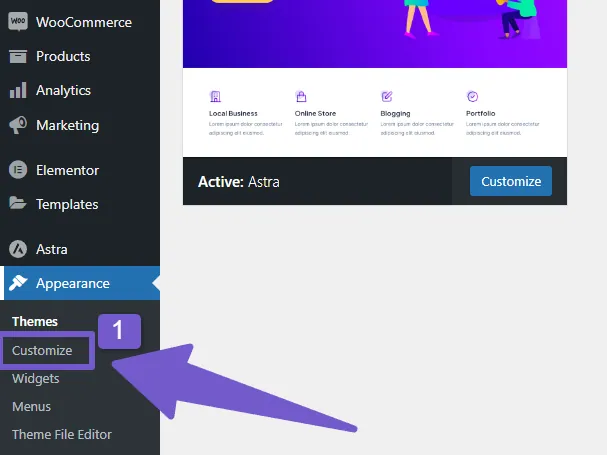
- Navigate to Appearance > Customize.
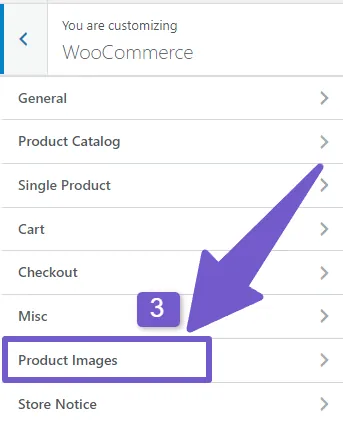
- In the Customizer, locate and click on WooCommerce.
- Click on Product Images.
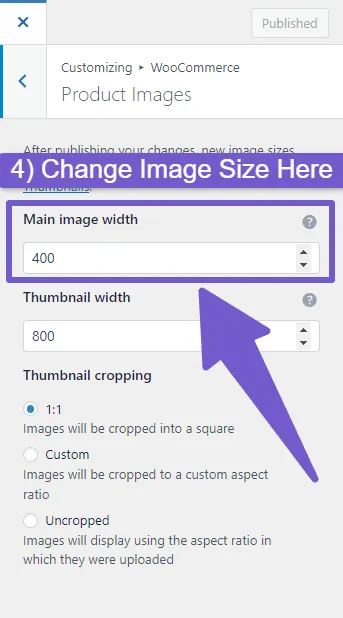
- There look for the Main Image Width field.
- Adjust the dimensions for the featured image according to your preferences.
- Make sure to maintain the aspect ratio for the image to avoid distortion.
- Save your changes by clicking the Publish button.

This will resize your WooCommerce single product page featured image.
While certain themes provide the option to change the size of the product featured image, not all themes offer this feature. In cases where the option is not available, the theme sets a default size within its internal code, so you might be wondering how to change now? Well, don’t worry, I will provide you with a code snippet that can be used to modify the size of the single product page image through code.
Resizing Single Product Page Featured Image through PHP Code:
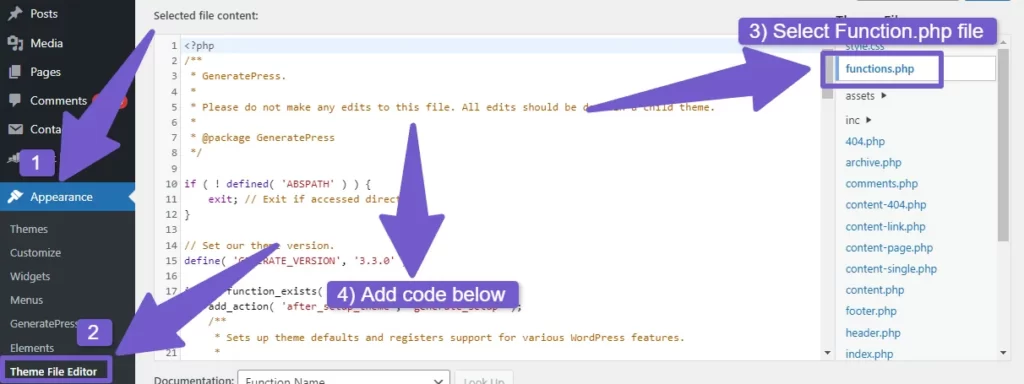
So here is the PHP code which you will need to add in function.php file of your theme, if you don’t know how to add custom code in function,php file, you can check out this guide on How to Edit functions.php in WordPress:
// // Override product image size on shop page
function custom_wc_shop_product_image_size($size) {
    $size['width'] = 800; // Customize the width as needed
    $size['height'] = 800; // Customize the height as needed
    $size['crop'] = 1;
    return $size;
}

add_filter('woocommerce_get_image_size_thumbnail', 'custom_wc_shop_product_image_size');
Now you know how to change single product page image size but what if you want to change width and height on the product image on the front-end screen, how you will do it. Well, I will show you that too.
Now that you know how to change the size of an image on a single product page, but what if you want to change the width and height of the image that appears on the front-end screen? Well, I will also show you that too.
Changing height and width of Single Product Page Featured Image:
To change Single product featured image width and height follow these steps:
- On your WordPress Dashboard, go to Appearance > Customize.
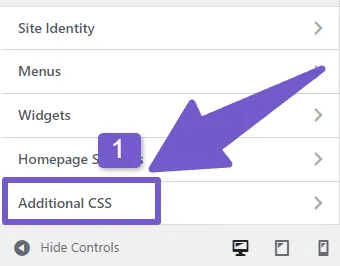
- In your theme customization locate Additional CSS tab.
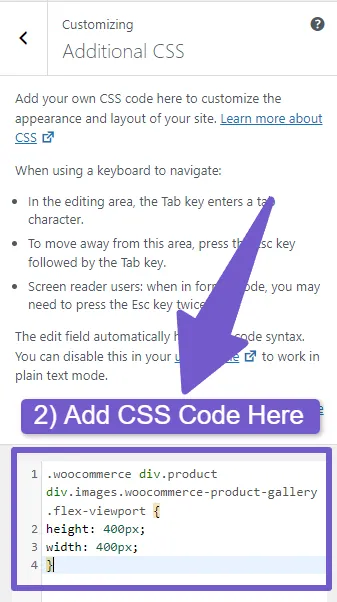
- There add this CSS code:
.woocommerce div.product div.images.woocommerce-product-gallery .flex-viewport {
height: 400px;
width: 400px;
}
Note: You can adjust height or width according to your own preference
Also Read: How to Disable Product Zoom in WooCommerce ( 4 Ways )
Now if you have changed the size, you can also adjust the single product page layout for featured images, so add this below code too in Additional CSS tab:
.woocommerce #content .ast-woocommerce-container div.product div.images, .woocommerce .ast-woocommerce-container div.product div.images, .woocommerce-page #content .ast-woocommerce-container div.product div.images, .woocommerce-page .ast-woocommerce-container div.product div.images{
width: 45% !important;
}
Next, I will show you how to change shop page product image size.
2) Resizing Shop Page Product Thumbnail Image in WordPress
To resize shop page product thumbnail image in WooCommerce, you can follow these steps:
- In your WordPress Dashboard, go to Appearance > Customize.
- In the Customizer, locate WooCommerce tab and click on it.
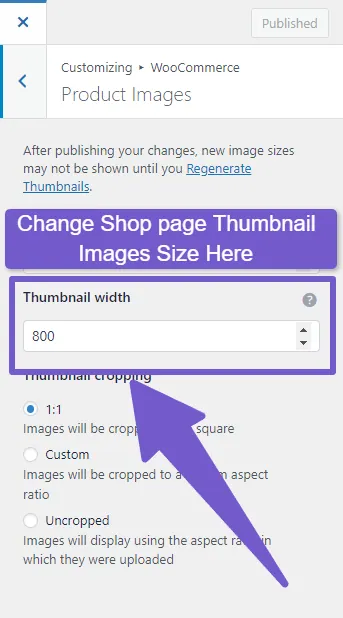
- Next, click on Product Images.
- Within the Product Images settings, you will find the option to adjust the size of the Shop page product image labeled as Thumbnail width.
- There you can adjust the size of shop page product image thumbnail.
- As you make changes, you will see a live preview of how the image will appear.
- Once you are satisfied with the new image size, click on the Publish button to save the changes.
By following these steps, you can easily resize the shop page product thumbnail image in WooCommerce using the WordPress Customizer.
Also Read: How to set Featured Products in WooCommerce ( 5 Ways )
Just like I told you earlier that some themes do not have the feature to adjust product featured image size, so if you want to change shop page product thumbnail image then look over this:
Resizing Shop Page Product Thumbnail Image through PHP Code:
Add this below PHP code in function.php file to change your shop page product thumbnail image size:
// Override product image size on single product page
function custom_wc_single_product_image_size($size) {
    $size['width'] = 800; // Customize the width as needed
    $size['height'] = 800; // Customize the height as needed
    $size['crop'] = 1;
    return $size;
}

add_filter('woocommerce_get_image_size_single', 'custom_wc_single_product_image_size');
Now if you want to adjust the height and width of the product thumbnail on the shop page, you should first know that the products are arranged in a grid format. The number of products per row determines the size of the product image.
If you have several products in one row, the image size will be smaller. However, if you set the number of products per column to 3 or 2, the image size (both height and width) will be larger.
Also Read: How to Change Number of Products per page WooCommerce
Change Number of products per column on shop page:
So if you want to change products per page follow these steps:
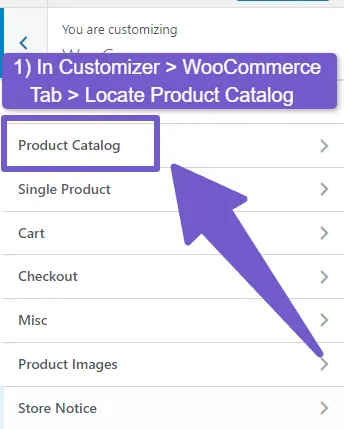
- Go to Appearance > Customize on your WordPress Dashboard.
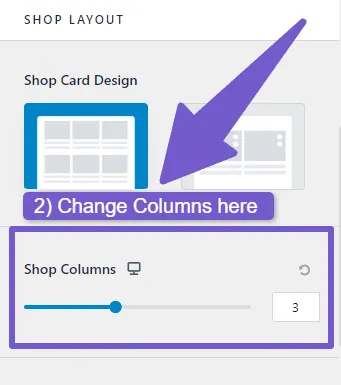
- Then go to WooCommerce > Product Catalog, there you will see a field for setting number of products per column.
- If you want your Products to appear larger on shop page then reduce products per column or if you want them to appear small then increase the product per column.
- Save your changes by clicking on publish.
However, if you still want some minor custom changes to the shop page thumbnail size, then add this CSS code in Additional CSS tab in your Theme customization:
@media (min-width: 600px)
.woocommerce ul.products li.product.mobile-align-left, .woocommerce-page ul.products li.product.mobile-align-left {
    text-align: left;
    width: 150px;
}
Note: this code will change width of product image for desktop screens only, if you want to change it on mobile then add this below code too, which will only change product image size on mobile:
@media (max-width: 599px)
.woocommerce ul.products li.product.mobile-align-left, .woocommerce-page ul.products li.product.mobile-align-left {
    text-align: left;
    width: 150px;
}
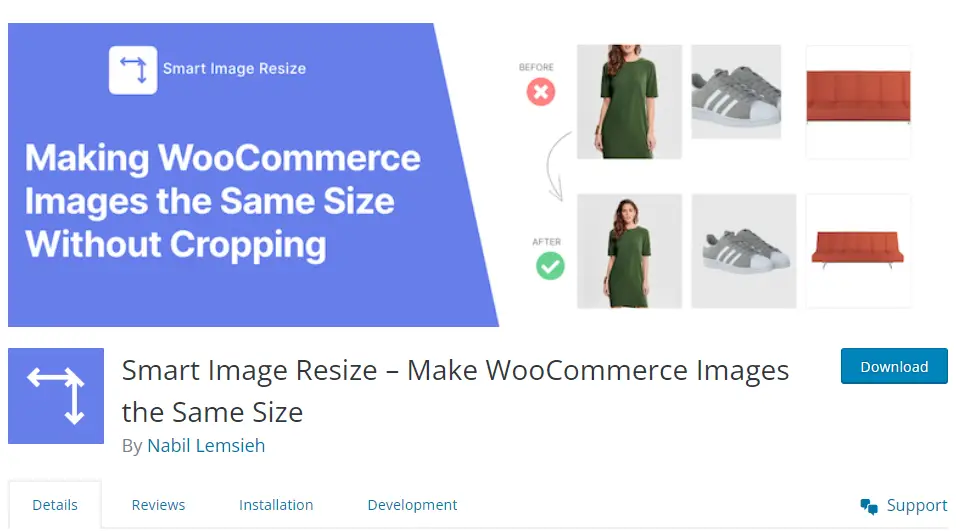
3) Resize Product Image size in WooCommerce with Plugin
If you want to resize the product image size in WooCommerce using a plugin, there are several options available. I will use one of the popular plugin named Smart Image Resize for WooCommerce.
To use this plugin follow these steps:
- Navigate to Plugins and click on Add New.
- Search for the “Smart Image Resize for WooCommerce” plugin.
- Install and activate the plugin.
- Once activated, go to plugin settings, you will find options to resize images for various sections, including the single product page and shop page thumbnail, also product gallery image resize option is available too.
- Adjust the width and height dimensions according to your desired size for each product page.
- Save the changes.
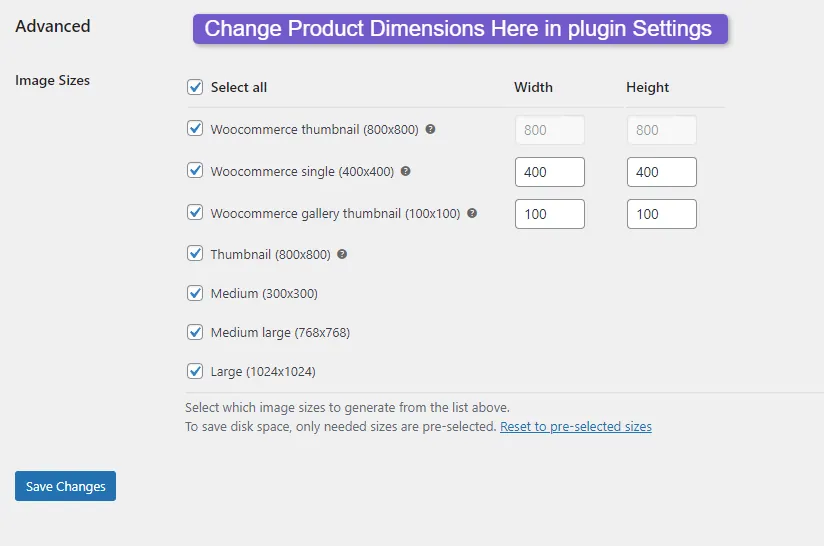
With the Smart Image Resize for WooCommerce plugin, you can easily resize the product images on the single product page and shop page to your preferred dimensions. This plugin provides a convenient solution for modifying the image sizes within WooCommerce without the need for manual coding or extensive customization.
FAQ ( How to Change Product Image size in WooCommerce )
How can I change the product image size in WooCommerce?
To change the product image size in WooCommerce, you can follow these steps:
1) Log in to your WordPress admin panel.
2) Go to Appearance > Customize from the sidebar menu.
3) In the Customizer, find WooCommerce and click on it, then go to Product Images.
4) Here, you will find options to adjust single product image, and thumbnail image sizes.
5) Modify the desired dimensions by entering values for width and height.
6) Once you are satisfied with the changes, click on Publish to save the new modifications.
How do I resize an image in WooCommerce?
To resize an image in WooCommerce, follow these steps:
1) Go to your WordPress admin dashboard.
2) Navigate to Media > Library.
3) Select the image you want to resize.
4) Click on Edit Image below the image details.
5) Enter the new dimensions or adjust them visually.
6) Click Scale button to apply the changes.
7) Save the resized image by clicking Update.
How do I change the product image in WooCommerce?
To change your product image in WooCommerce follow these steps:
1) Go to your WordPress admin dashboard.
2) Click on Products and select All Products.
3) Choose the product you want to edit.
4) In the product editor, find the Product Image section or Product Gallery.
5) Remove the current image if desired.
6) Upload a new image from your computer or select one from your media library.
7) Crop and resize the image if needed.
8) Save the changes by clicking Update.
9) The product will now display the updated image on your WooCommerce store.
What are catalog images, single product images, and thumbnail images?
In WooCommerce, catalog images are the images displayed in the product listing or category pages, while Single product images are the images shown on the individual product pages and Thumbnail images are used in various parts of your online store, such as related products, shop page or widgets.
Also Read: How to Remove Related Products WooCommerce ( 5 Ways )
Will changing the image size affect the quality of my original product images?
Changing the image size in WooCommerce will not affect the quality of your original images. However, resizing images will only affect images quality on frontend of the site, if the new dimensions are significantly different from the original image. So, It is recommended to use high-resolution images and optimize them before uploading to ensure they are of best quality.
What is the recommended image size for WooCommerce product images?
The recommended dimensions for product images in WooCommerce can vary based on your website theme and design. However, a commonly used image size for catalog images is around 800 x 800 pixels wide and tall. For single product images, a size of 1200 x 1200 pixels is often recommended. Thumbnail images are usually smaller, around 400 x 400 pixels.
My WooCommerce product images are blurry on site, but original images have better quality?
If you’re experiencing blurry product images on your WooCommerce site, it’s likely because WooCommerce automatically adjusts the image size for improved performance. However, if you want to enhance the image quality and prevent blurriness, you can increase the image dimensions.
To do so, go to your WordPress customizer > Locate WooCommerce > Product Images, there you will see Main product image, increase its dimensions. By increasing the dimensions of the main product image, you can improve the quality of your product images and eliminate blurriness.
My Final Thoughts on this Topic
Changing product image size in WooCommerce website can be done by following a few simple steps outlined in this article. Understanding the default image sizes is the first step, after that, you can determine your desired image sizes based on your website’s design and performance needs, and then easily change them by following the steps mentioned in this guide.
I hope this article has provided you with the information you were seeking. If you have any question related to this topic, please feel free to comment down below, and I will reply you as soon as I can. Thanks for reading…!