
Has a printer, a print shop or your own screen told you a picture is too small, so now you need to increase the resolution of an image that is the only one you have?
Before anything else, one honest sentence saves you a lot of time: nothing can put back detail that was never recorded. A small photo does not have a sharp version hidden inside it waiting to be found. Enlarging either stretches the pixels you have or invents new ones that look plausible, and those are different things from recovering the picture.
That sounds discouraging and it is the opposite, because it points you at the things that do work:
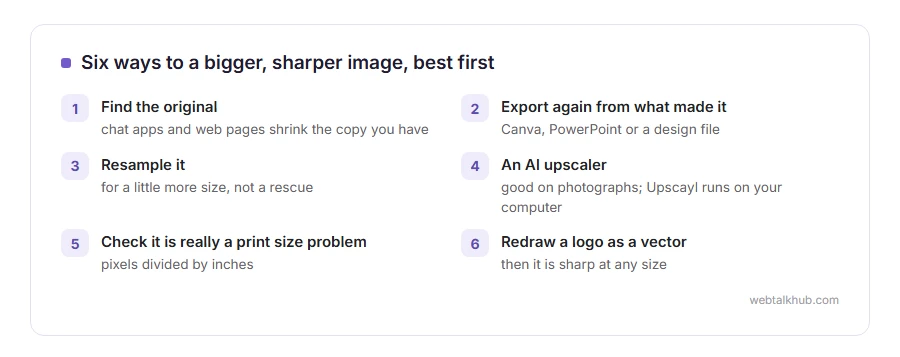
- Finding the original file, which is bigger than the copy you are holding
- Exporting again from whatever made the image
- Resampling properly when you only need moderately more pixels
- An AI upscaler, which is genuinely good on photographs
- Fixing the print size instead, which is often the real problem
- Redrawing a logo as a vector, so size stops mattering
Before you start, keep a copy of the original. Every step below is easier to undo when the file you began with is still sitting there untouched.
In this article you will learn all six, in the order that gets the most back, and what each one costs you.
So let’s get started.
1) Hunt down the original first
The copy in your hand has usually been through something that shrank it, and the full size file still exists somewhere.
WhatsApp compresses every photo sent as a photo, and the same picture sent as a document arrives untouched. Facebook, Instagram and most chat apps do the same. A picture saved from a web page is often the display version, so open it in its own tab and check, since many sites serve a larger file to bigger screens. In Google Photos, downloading gives you the original rather than the preview.
If somebody sent it to you, asking them for the file straight off their camera roll takes one message and beats every technique on this page. This will not help when the image only ever existed as a screenshot or was posted years ago and deleted, which is when the rest of the list starts.
2) Export again from whatever made it
If the image came out of Canva, PowerPoint, Figma, Illustrator or a design file, the source has no fixed size and can produce whatever you need.
In Canva, download as PNG and turn on the larger size option. In PowerPoint, right click the picture, save as picture, and the export dialog offers the full resolution. Anything vector, such as an SVG or a PDF drawing, can be exported at any size at all with no loss, because it stores shapes rather than pixels. Our page on what an SVG is explains why, and our SVG to PNG converter does the export in the browser.
This is the route people forget most often, and it is the one that gives a perfect result rather than a good one.
3) Resample it, and know what that does
When you need somewhat more pixels rather than a rescue, ordinary resizing is fine.
On Windows, open the picture in Photos, choose Resize, and pick a custom size. On a Mac, open it in Preview, then Tools, Adjust Size. In the browser, our image resizer does it without uploading the file anywhere, and our PNG to JPG and JPG to PNG pages handle the format side.
What happens underneath is that the software works out the colour of each new pixel from its neighbours. Going up by half again, or double, holds together for most photographs. Push a small image up by four times and the result is soft, because there is nothing there to sharpen, and a sharpening filter afterwards mostly adds grain and halos around edges.
4) Use an AI upscaler, on the right kind of image
These models have been trained on millions of real photographs, so they do not stretch the picture, they rebuild it from what such a picture usually looks like.
On a face, a landscape or an old family photo the result can be remarkable. Upscayl is free, open source and runs on your own computer with nothing uploaded, which matters if the photo is personal. The web based ones are quicker for a single image and want an account for anything larger.
Keep in mind what the word rebuild means here. The model is inventing detail that fits, not uncovering detail that was there, so it is unreliable on text, logos, number plates, screenshots and documents, where it will happily produce letters that were never written. I do not recommend it for anything that has to be accurate rather than pretty.
5) Check whether it is really a print size problem
Half the people told their image is low resolution are being told about print, and the fix is arithmetic rather than software.
Print quality is pixels divided by inches, so a photo 3,000 pixels across prints at ten inches wide at 300 DPI, or fifteen inches at 200 DPI, which is fine for anything viewed from more than arm’s length. Work out the size you actually need before deciding the file is too small, and our page on what DPI means has the full explanation.
There is one thing that catches everybody. Changing the DPI number in a file’s properties without resampling changes nothing about the image at all, because the pixels are the same and only the printing instruction moved. If a printer asks for 300 DPI, they are asking for enough pixels, not for a number in a box.
6) For a logo or an icon, redraw rather than enlarge
A blurry logo is not a resolution problem to solve, it is a file format problem.
A logo should be a vector, and then it is sharp on a business card and on a billboard from the same file. If all you have is a small PNG, a designer can retrace it in an hour, and several online tools will trace a simple shape automatically. For an icon, our PNG to ICO page covers the sizes Windows expects.
Upscaling a logo is the one case where the AI route does more harm than stretching it, since it will smooth the straight edges and reshape the letters, and you end up with something close to your brand rather than your brand.
FAQ(Increase Image Resolution)
Can you really increase the resolution of an image?
You can make it bigger, and you cannot recover detail that was never captured. Resampling stretches what is there and AI upscaling invents what fits, which is why the original file always beats both.
What is the free way to enlarge a photo?
Preview on a Mac, Photos on Windows, or our browser resizer for a moderate enlargement. For a photograph that needs a bigger jump, Upscayl is free and runs offline.
Why does my photo look blurry after resizing?
Because the extra pixels were worked out from the ones next to them rather than measured. The bigger the jump, the softer the result, and sharpening afterwards adds noise rather than detail.
Does changing DPI improve quality?
No. On a screen the DPI value is ignored completely, and in print it only sets how large the existing pixels are spread, so the number alone changes nothing.
What resolution do I need for printing?
Around 300 DPI at the finished size for something held in the hand, and 150 for a poster seen from a distance. Multiply the inches you need by that figure to get the pixels.
If you have any issues, you can ask me via comment, and I will love to help you out.
If a printer only wants the number changed
Sometimes the pixels are already enough and only the DPI setting is wrong.
- changing the DPI of an image, which takes a minute and changes nothing you can see.
