
The header of a WordPress website serves as the first impression for your visitors. It is the section at the top of your site that typically contains your logo, navigation menu, and other essential information and links.
One of the most effective ways to improve your website’s design is by using attractive colors on your site. Modifying the header background color can help you create a unique and attractive look for your site.
So if you are here to learn how to change header background color in WordPress website, you are in the right place. WordPress is a widely used platform for creating and managing websites, It allows you to customize various aspects of your site without the need to be a full stack web developer.
But, changing the header color isn’t that simple, and you need a guide like this one to show you the step by step process on how to change it easily.
Also read: How to Change Logo Size WordPress ( 4 Easy methods )
4 Ways to change background color of header in WordPress
I have got four simple ways to help you change the background color of your header in every WordPress theme, I will explain each method step by step, so just follow accordingly and you can choose the method that suits your needs and preferences.
1) Change Header Color in WordPress Theme Customization
Many WordPress themes come with built-in customization options for the header, and you can easily change the background color of header there. Let me show you how to change it:
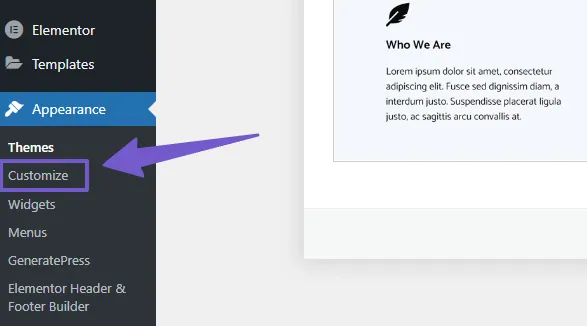
First, go to your WordPress Dashboard. Then, click on Appearance > Customize. Now, in the customization menu, you might see various options, I will use the Astra theme and GeneratePress as examples to show you where to find the option to change the header background color. However, the general steps are similar regardless of your theme.
If you are using the Astra theme, you can easily change the color of your website’s header in Header Builder Tab. But you can also just directly hover over the header area, click the edit icon that appears, and go to the Design Tab to change the header color.

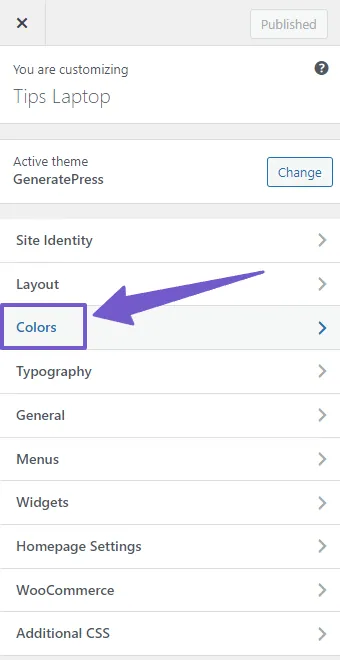
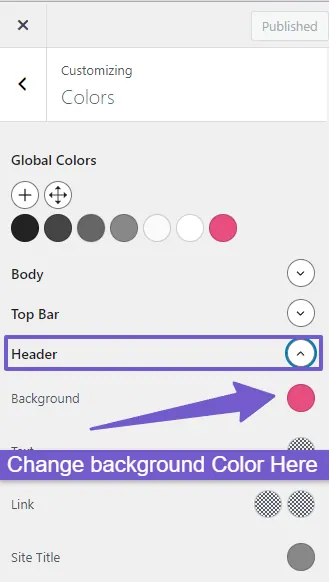
If you are using the GeneratePress theme, and when you open the customization options, you will see the Colors Tab right away. Click on it, and there you can change the colors of different parts of your website. But you are here to change header color, so simply click on the header option and pick the color you want.
Lastly, Publish your change and preview the live site, you header background color will now be changed.
2) Changing Header Background Color Using Custom CSS Code
The second way is to change the header background color by using custom CSS code. This method is more flexible because it allows you to not only change the header color but can also make many other changes to the header. It’s especially comes in handy when your theme doesn’t have easy ways to customize the header.
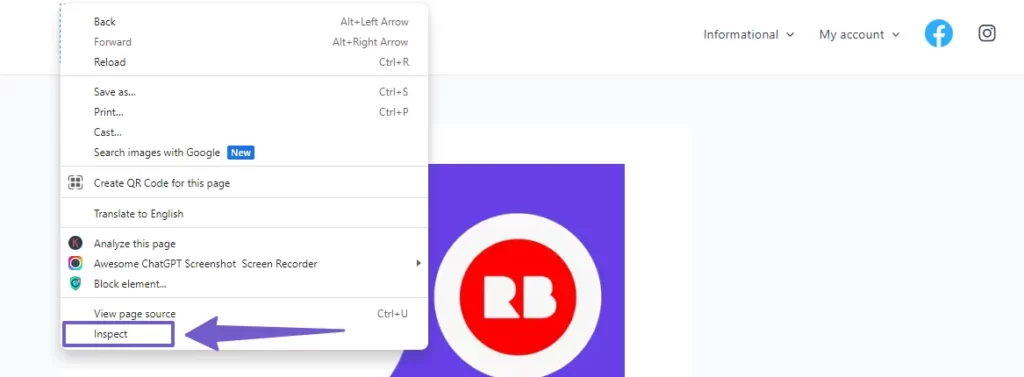
Todo so, open your live website, then, right-click on the header area and choose Inspect Element. In the inspect element tool that appears, find the Styles tab. There you will see the Class name for the header, inside the brackets, you can add the background color you want.
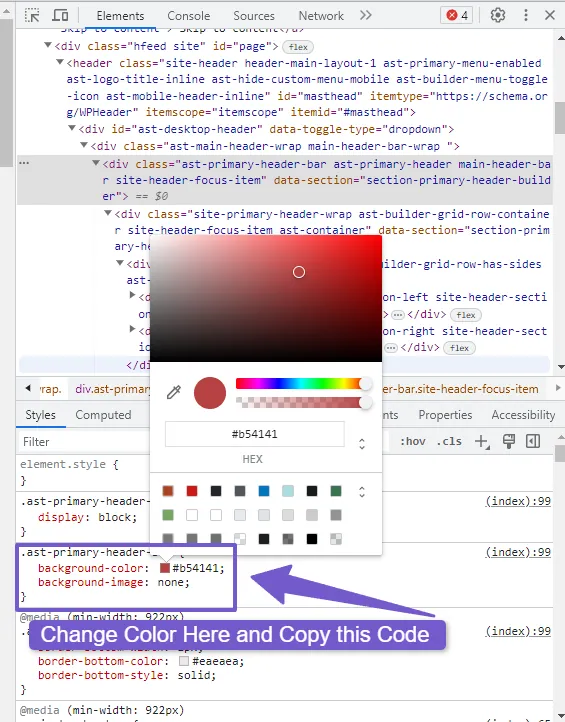
When you do this, you’ll see the header color change right away on your live site. Once you’re satisfied with the color change, simply copy the code you used.
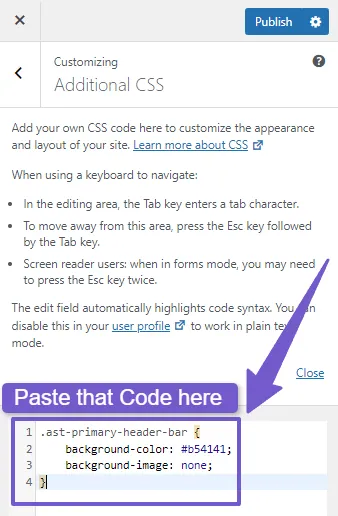
Now, Navigate to WordPress Dashboard > Appearance > Customize, in customizer, scroll down below and open the Additional CSS tab, there paste the code which you just copied and save the changes. The header background color will be now successfully changed.
For most of the themes, you can just simply add this code in Additional CSS tab and this will change the header color:
.site-header{
background-color: your-color-code !important // add you color here
}
3) Change Header Background Color with WordPress Page Builders
Many WordPress websites are built using page builders like Elementor, Beaver Builder, or Divi. These page builders provide a user-friendly interface for designing and customizing various parts of your website, including the header.
To change the header background color using a page builder ( I will be using elementor page builder as an example), follow these general steps:
Log in to your WordPress Dashboard and navigate to the Home page where you will to change the header color. Edit the page using your preferred page builder, such as Elementor.
Note: This feature is for Elementor Pro, if you are using the free version, then you will need an additional plugin to edit header.
You should first learn how to edit header in free version of elementor here.
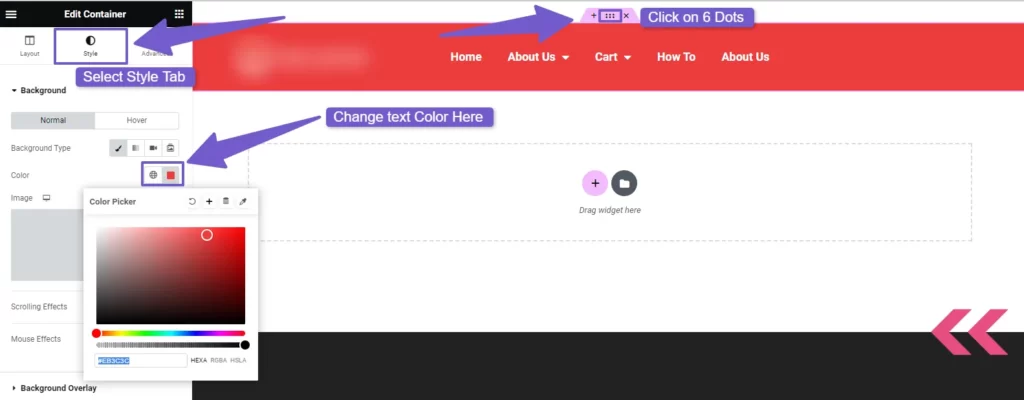
When you are working on your homepage with Elementor, you will see an option(edit icon) to edit the header. Click on it, and then choose the entire header section, now in the Elementor’s editing panel, there are three tabs: Layout, Style, and Advance.
Navigate to the Style tab, click on Background type, and there you can adjust the header’s background color.
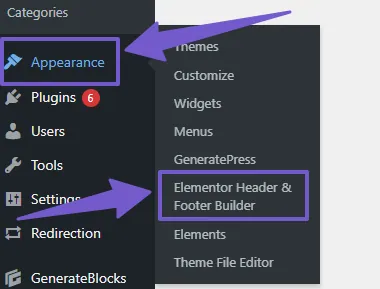
However, if you are using the free version of Elementor, the process is similar. As you have learned in my guide edit header in Elementor free version with the plugin. So, go to Appearance and select Elementor Header & Footer Builder Tab( which will appear due to the plugin you have installed ). From there, choose the header and apply the same steps as mentioned earlier.
Elementor sometimes failed to load properly, if you also face this type of issue, then you can learn here to fix elementor not loading.
This method makes it easy to change the header color. For other page builders, you might need the pro version to modify the header background color. However, the basic steps remain the same: edit the header using your preferred page builder, find the style or design section, and make the color changes there.
4) Change Header Background Color with Plugin
If you prefer to work with your website using a simple visual editor instead of writing code or manually customizing through theme, then this method is for you. With a plugin, you can easily change the background color of your website header, and these visual editing tools make it super easy.
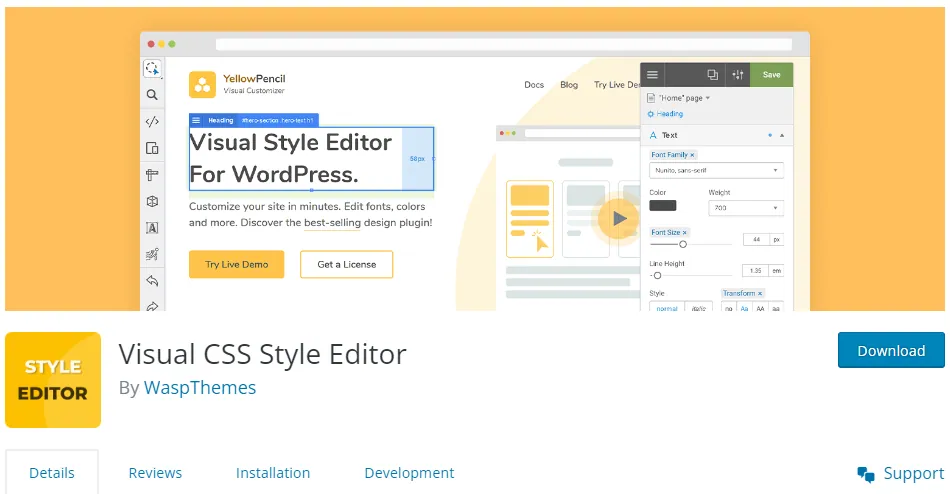
There are two popular plugins that can assist you in changing the header’s background color, these are SiteOrigin CSS and Yellow Pencil. I will show you how to use the SiteOrigin CSS plugin because it’s free and simple to use. Yellow Pencil is also an option and works similarly, but not all of its features are free. So, let’s begin with SiteOrigin CSS.
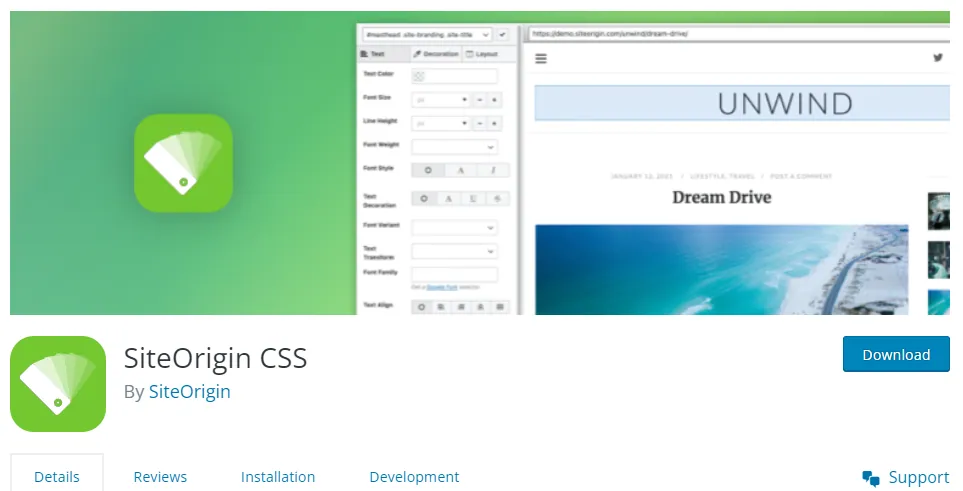
First, you need to install and activate the SiteOrigin CSS plugin. After it is activated, go to your WordPress Dashboard > Appearance > Custom CSS ( SiteOrigin CSS Tab ). In this section, you will see an eye icon that lets you open your site in Visual Mode. Click on it, and your site will appear in the SiteOrigin Editor.
Next, click on the header, in the left side of the editor, you’ll find a Decoration Tab. Here, you can easily change the background color of your header. This editor also offers many other features to make various changes to your site’s design. It is a handy way to customize your site without needing to be a coding expert.
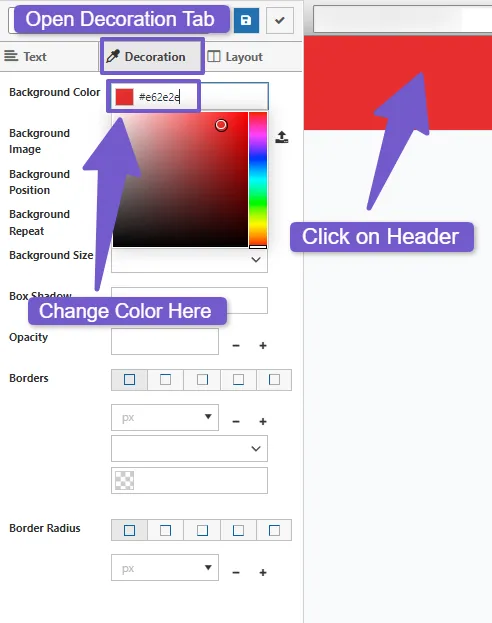
Note: Any changes you made in Siteorigin Editor, they will be automatically converted into CSS code, you just have to visually edit the site.
You can also change the header background using Yellow Pencil plugin. To do so: First, install and activate the plugin. Then, go to your live site, and in the admin toolbar, look for the Yellow Pencil icon and click on it. The entire page will opened in the editor so from there, you can easily change the header color ( As I said both plugin Working methods are same ).

Using the SiteOrigin CSS plugin and Yellow Pencil gives you the flexibility to customize your header’s background color without needing to write code manually. These plugins offer user-friendly interfaces for making any design changes, which makes them very useful for WordPress developers who don’t have extensive coding knowledge.
You May Like To Read:
How to Change Footer Copyright Text in WordPress
How to Change Link Color in WordPress ( 4 Methods )
How to Change Text Color in WordPress ( 4 Easy Ways )
FAQ( How to Change Header Background Color in WordPress )
How can I change the header background color in WordPress?
To change the header background color in WordPress, navigate to WordPress Dashboard > Appearance > Customize. In customizer, look for Colors Tab, there you can adjust colors for various parts of your website, now look for the option that says Header Background Color, click on it and change the color.
What if my theme doesn’t have built-in customization options for the header background color?
If your theme does not have built-in options to change header color, you can then use OriginSite CSS plugin. First, you need to install and activate this plugin, once it’s done, navigate to Appearance > Custom CSS, there click on Visual Mode Editor icon, then click on the header and in the left side toolbar, change the header background color.
How to change header background color with CSS Code?
If you want to change the background color of your website’s header, you can use CSS code,
First, go to your live website and right-click on the header area. Then, choose Inspect, in the Styles tab that appears, you will see header class name. Inside the curly brackets, just type “background-color: Red;” (you can replace “Red” with any color you like). You will see header color being changed live.
Now, copy this whole CSS code with the Class. Next, go to your WordPress Dashboard > Appearance > Customize. Inside the customizer, look for Additional CSS Tab. Paste the code you copied and click Publish, the header color will be changed.
Can I change the header background color for specific pages or posts?
Yes, you can change the header background color for specific pages or posts by using custom CSS that will just target the specific page header or by utilizing page builder plugins that offer per-page customization options.
My Final Say on this Topic
Changing the header background color in WordPress is a great way to enhance your website’s appearance and I am glad you took this decision. In this guide, we explored four different methods to do it:
- WordPress Theme Customization
- Page Builders
- Plugins:
- Custom CSS Code
Choose the method that best suits your needs and preferences. Whether you’re a beginner or an experienced WordPress user, The methods I provided is for all type of WordPress Users. I hope you would have learned alot in this guide, if you still have any other question, leave me comment below, and I will assist you as soon as possible.
Thanks for reading. Have a great day ahead…!